

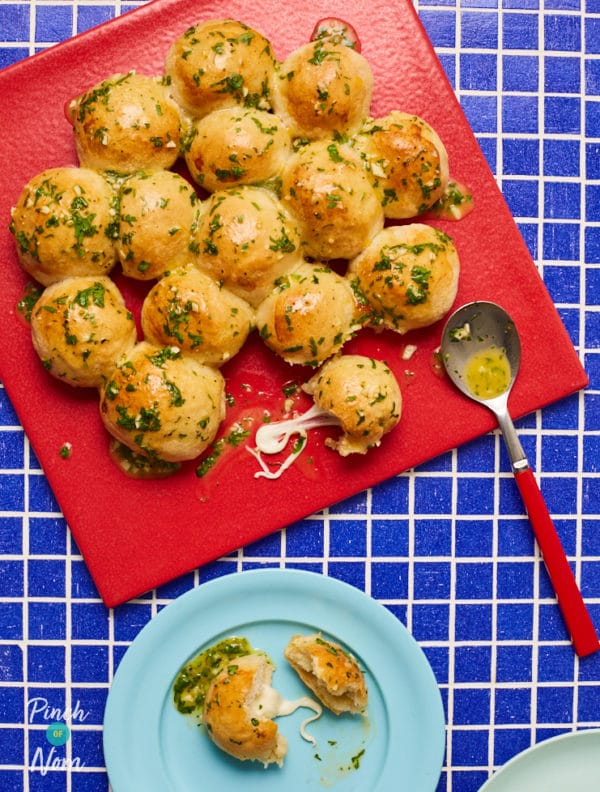
Tear & Share Cheesy Garlic Dough Balls
These Tear & Share Cheesy Garlic Dough Balls are too good to be true. Not only are they drizzled in garlic butter, they’re also stuffed with gooey mozzarella cheese!
Also in these categories:


NutritionPer Serving
- Calories74
- Carbs12g
- Protein2.7g
- Fat1.7g
- Saturates0.5g
- Sugars0.5g
Your dishes
You’re amazing, look at the Tear & Share Cheesy Garlic Dough Balls dishes you’ve made…


For the full list of ingredients and comprehensive instructions, please see the recipe card below. Before you scroll, there’s important stuff in the blurb!
When you think of slimming friendly food, you probably think that anything cheesy, bready and smothered in butter is off the menu. Well, think again, because these Tear & Share Cheesy Garlic Dough Balls are just as good as the ones you get at your favourite Italian restaurant (but much lower in calories!).
Our recipe involves making the dough from scratch – it might sound scary but it’s easier than you may think. The garlic ‘butter’ is actually made with reduced fat spread, so it packs in all the flavour without adding lots of extra calories.
To take this recipe to the next level, we’ve added a cube of mozzarella into the centre of each dough ball. There’s nothing better than biting into that cheesy, garlicky deliciousness!
These are the perfect side dish for an Italian themed Fakeaway night. If you don’t have time to make them from scratch on the day, they can be made in advance and frozen – just make the garlic ‘butter’ fresh on the day for the best flavour.
What diets are these Tear & Share Cheesy Garlic Dough Balls suitable for?
This Tear & Share Cheesy Garlic Dough Balls recipe is suitable for vegetarians as long as you use a vegetarian mozzarella cheese.
Please make sure to double or triple check all of your ingredients if you’re cooking for people with allergies.
Do you need any special ingredients to make Tear & Share Cheesy Garlic Dough Balls?
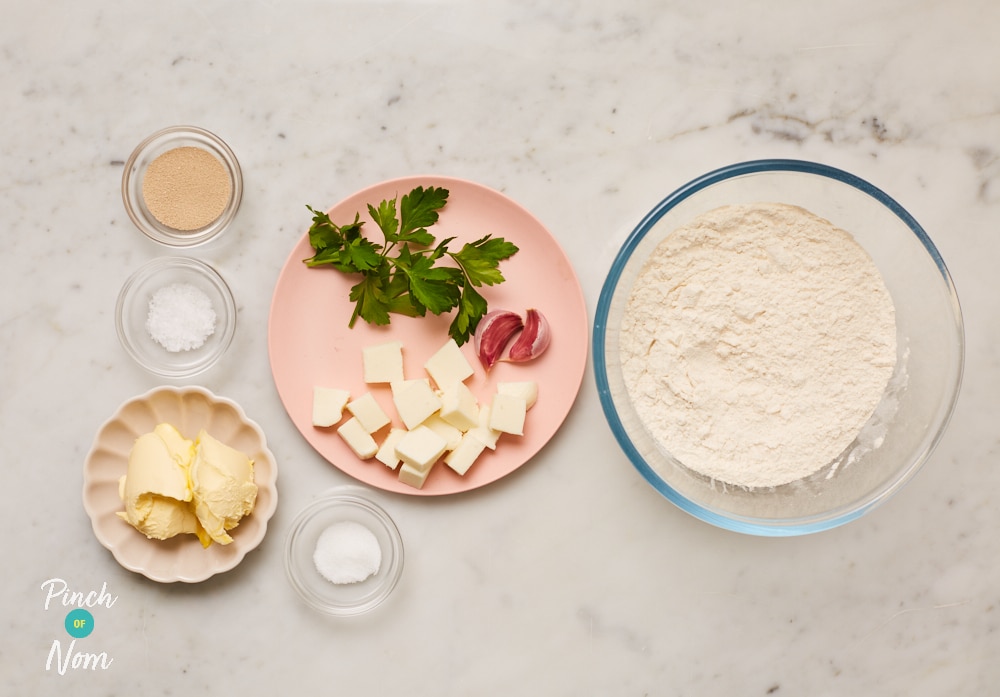
You’ll need some strong white bread flour to make these Tear & Share Cheesy Garlic Dough Balls. This contains more gluten than other flours, which makes it suitable for bread making as the dough needs to stretch and rise during baking.
You will also need some easy blend dried yeast – this type of yeast can be mixed directly with your dry ingredients. It can also be known as ‘fast action’, ‘quick’ or ‘instant’ yeast.
Both of these ingredients can be found in the baking aisle of most supermarkets.
Hints & Tips
Below we added some of our communities most common hints and tips. We hope you find them useful.
Send us a Hint or Tip
We love hearing from you, submit any tips or tricks you have for this dish and we’ll review them and add some of them here. Just click here.
SEND US a HINT & TIP, Or QUOTE for this recipe
THANKS
we have your picture
The process
- Check
Now we have your Hint & tip
we’ll check them over. - Review We’ll review your Hint & Tip, and see if its suitable to use on the website.
Your details
- Name: %name%
- Recipe: %recipeName%
YOUR HINTS & TIPS
Your “QUOTE”
SWAG!
Due to the large number of submissions we recieve we’re afraid we’ll only inform you if we use it on the Recipe page - then we’ll send you some swag…
(Please remember others may of had the same idea as you!)
‘I am posting this from heaven ... That's where this recipe must have come from! The dough balls are super easy to make and are mega yummy!’
This post contains affiliate links: what this means
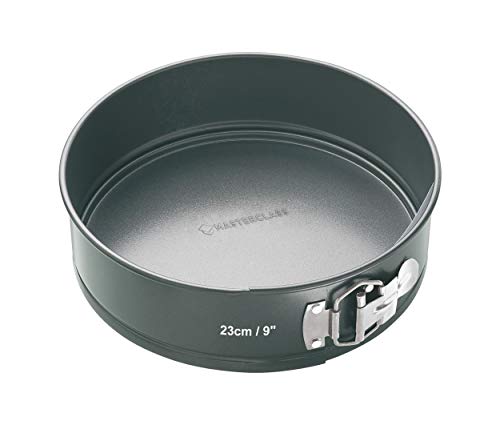
You’ll need a 23cm round, loose bottomed cake tin for this recipe. It makes nit so much easier to remove the dough balls after cooking!
You can also pick up strong white bread flour online.

How many calories are in these Tear & Share Cheesy Garlic Dough Balls?
There are 74 calories in each portion of these Tear & Share Cheesy Garlic Dough Balls, which means it falls into our Everyday Light category.
This Tear & Share Cheesy Garlic Dough Balls recipe is perfect if you’re following a calorie controlled diet, and fits well with any one of the major diet plans such as Weight Watchers.
As a guide, an average man needs around 2,500kcal (10,500kJ) a day to maintain a healthy body weight. For an average woman, that figure is around 2,000kcal (8,400kJ) a day. Obviously, if your goal is to lose weight then you might want to adjust these slightly! You can read more about these recommendations on the NHS website.
Step 1
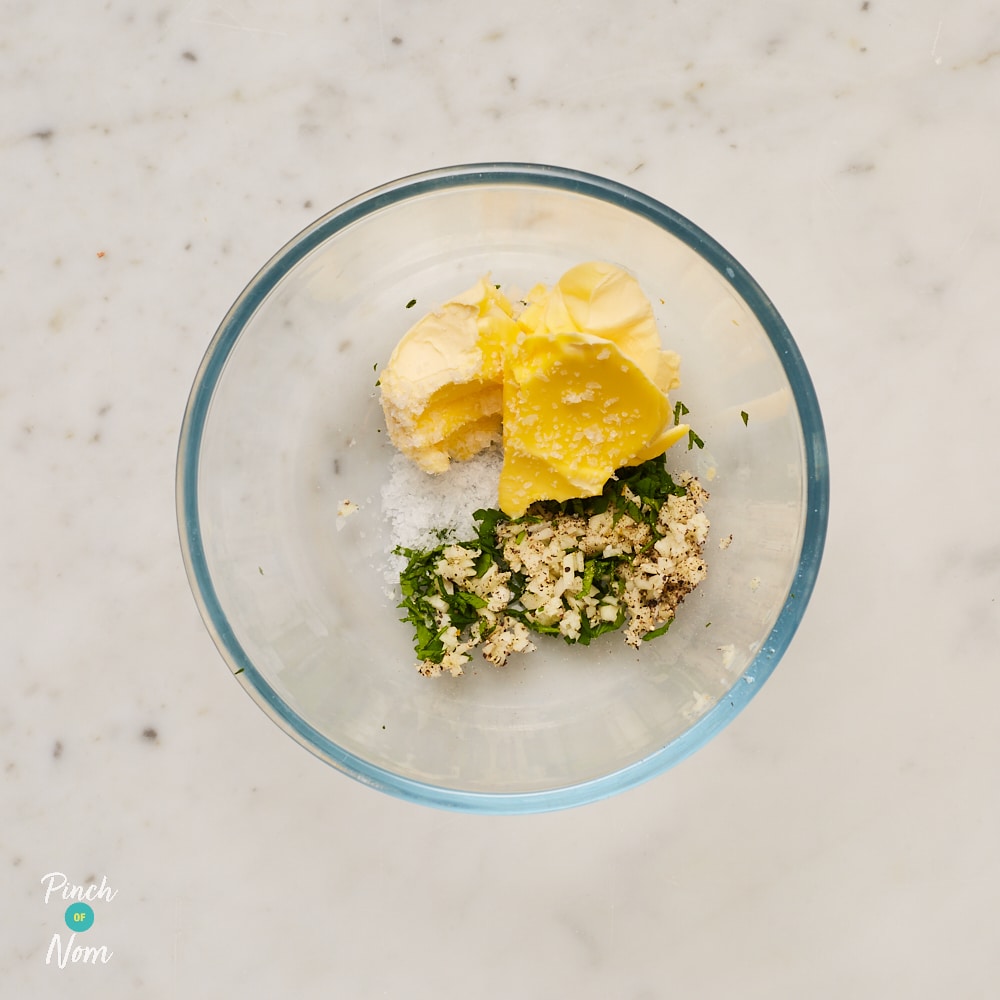
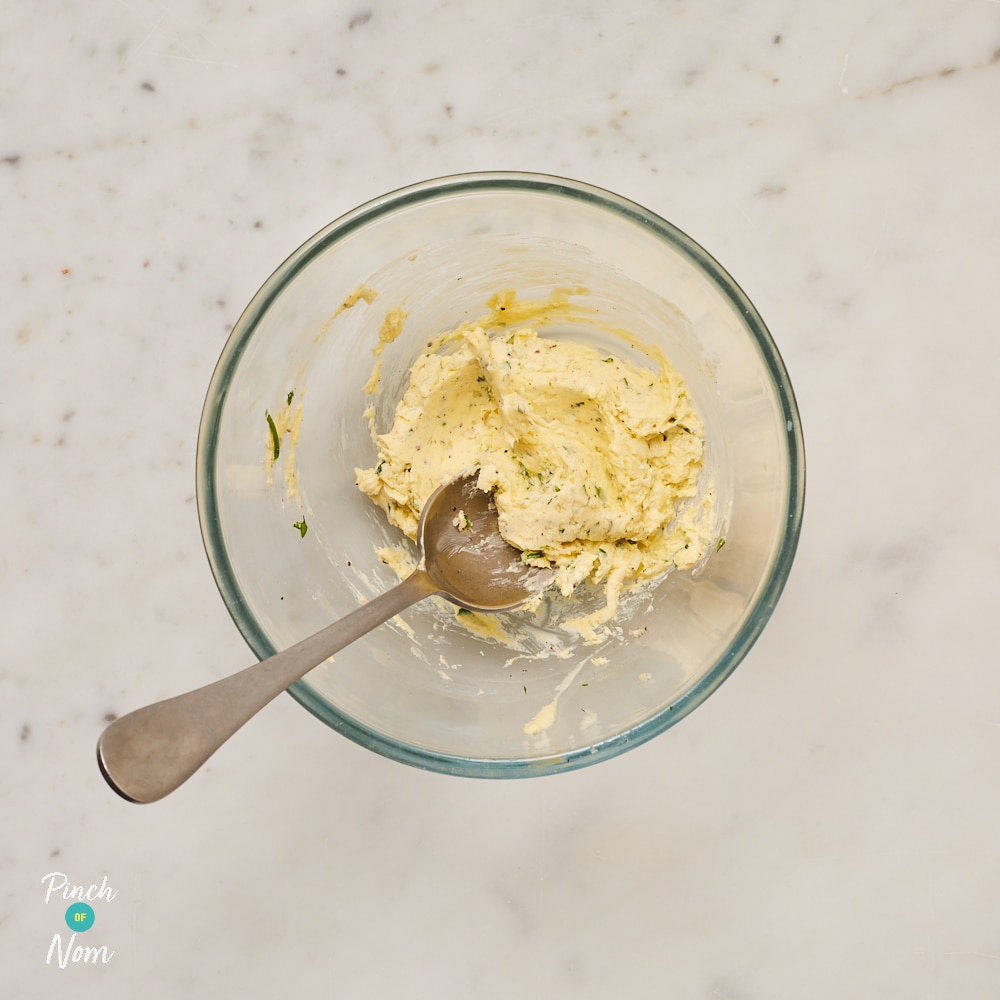
Make the garlic ‘butter’: Place the reduced fat spread, garlic, parsley, salt and black pepper in a small bowl. Stir until well mixed then place in the fridge while you make the dough balls.
Step 2
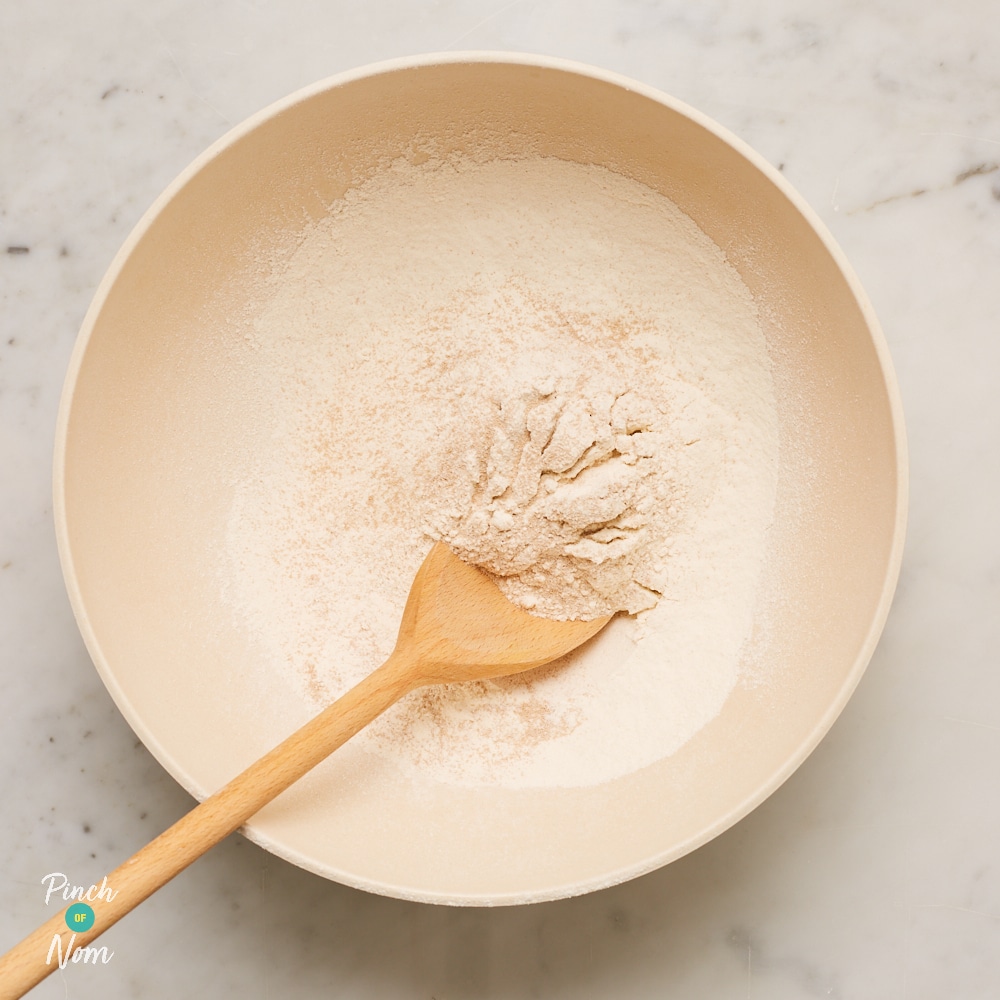
Make the dough balls: Spray a 23cm round loose bottomed cake tin with low calorie cooking spray and use to grease the tin. Line the base with a disc of non-stick baking paper. Sift the flour into a large mixing bowl. Stir in the yeast, caster sugar and salt until evenly mixed.
Step 3
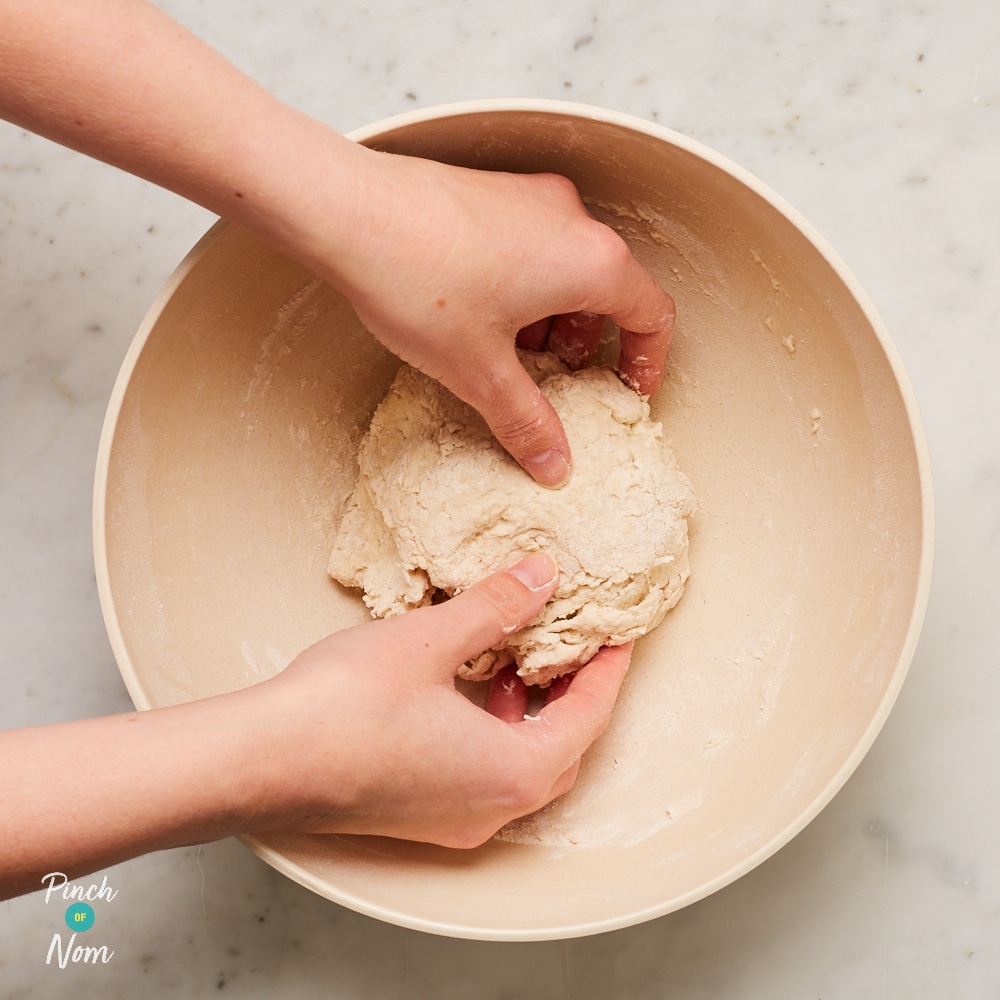
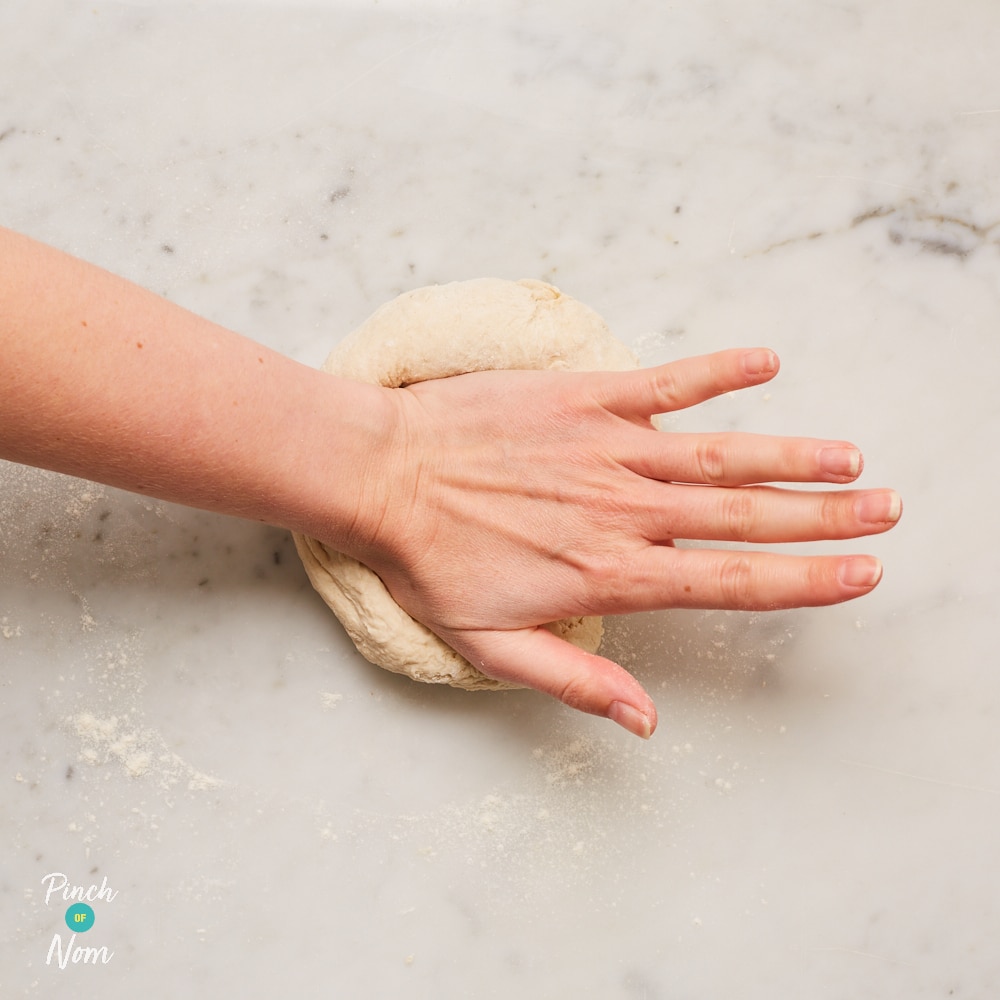
Add the warm water and mix with a round bladed knife until the dough starts to come together. Use clean hands to press the dough together into a ball, then turn out onto a lightly floured surface.
Step 4
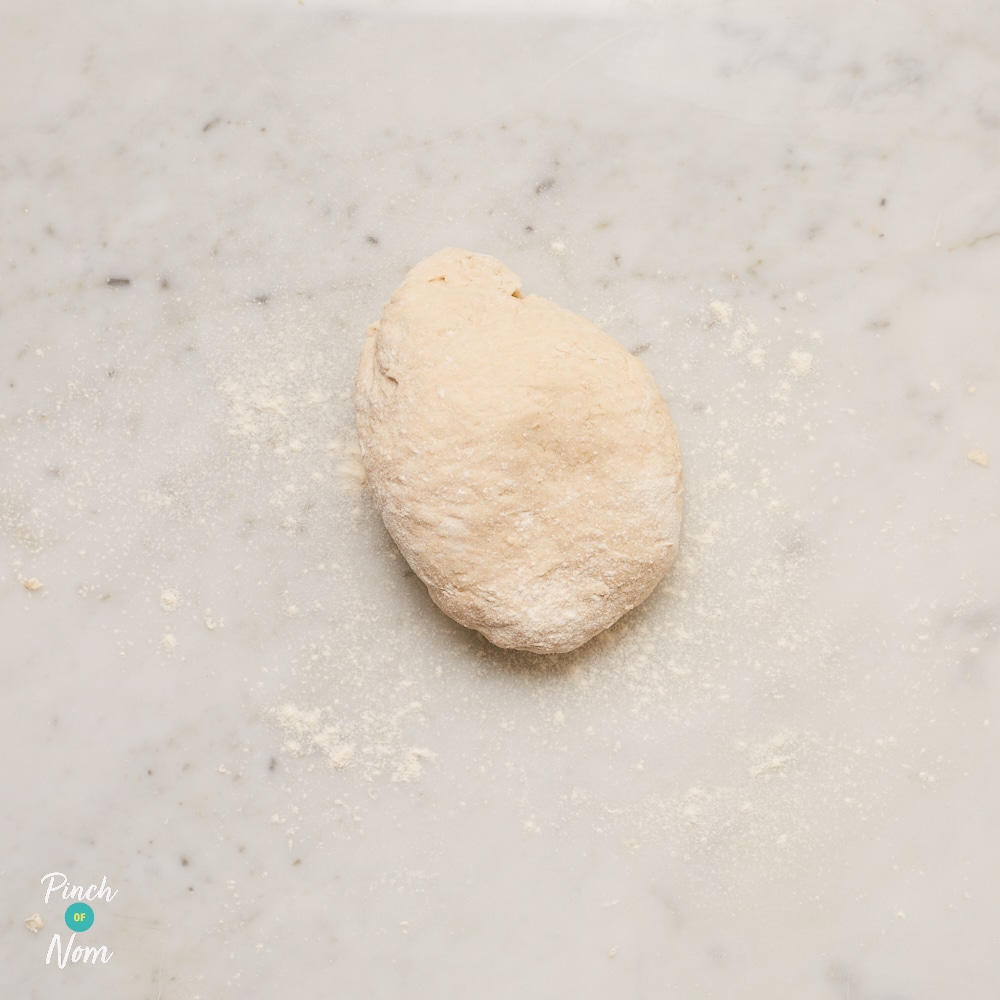
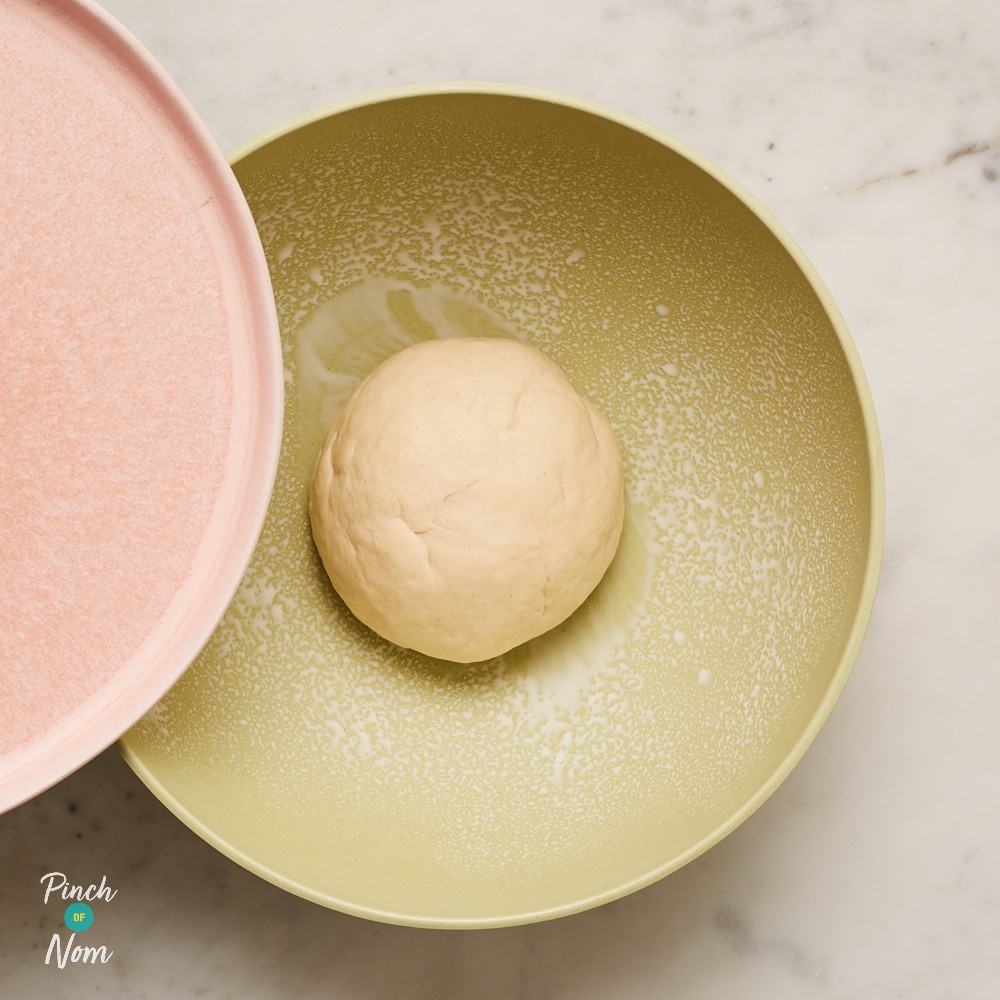
Knead the dough for 10 minutes, until smooth and elastic. Spray a clean, large mixing bowl with a little low calorie cooking spray and use to thoroughly grease the bowl.
Step 5
Place the dough, seam side down in the greased bowl and cover with a plate. Put it in a warm place to prove for 1 hour until the dough has at least doubled in size and feels puffy when pressed. Preheat the oven to 200ºC after the dough has been proving for 45 minutes.
Step 6
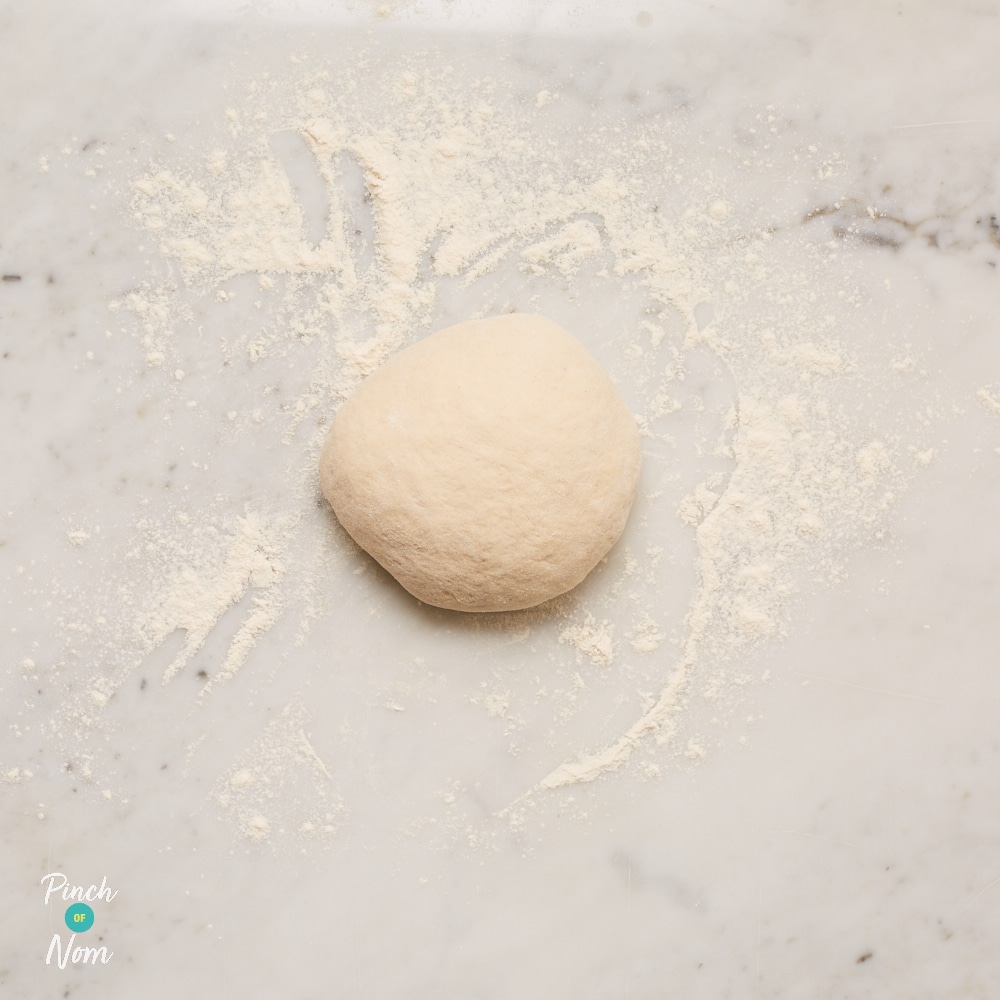
Turn the dough out onto the surface and lightly knead just four or five times. Form into a smooth ball placing seam side down on the surface.
Step 7
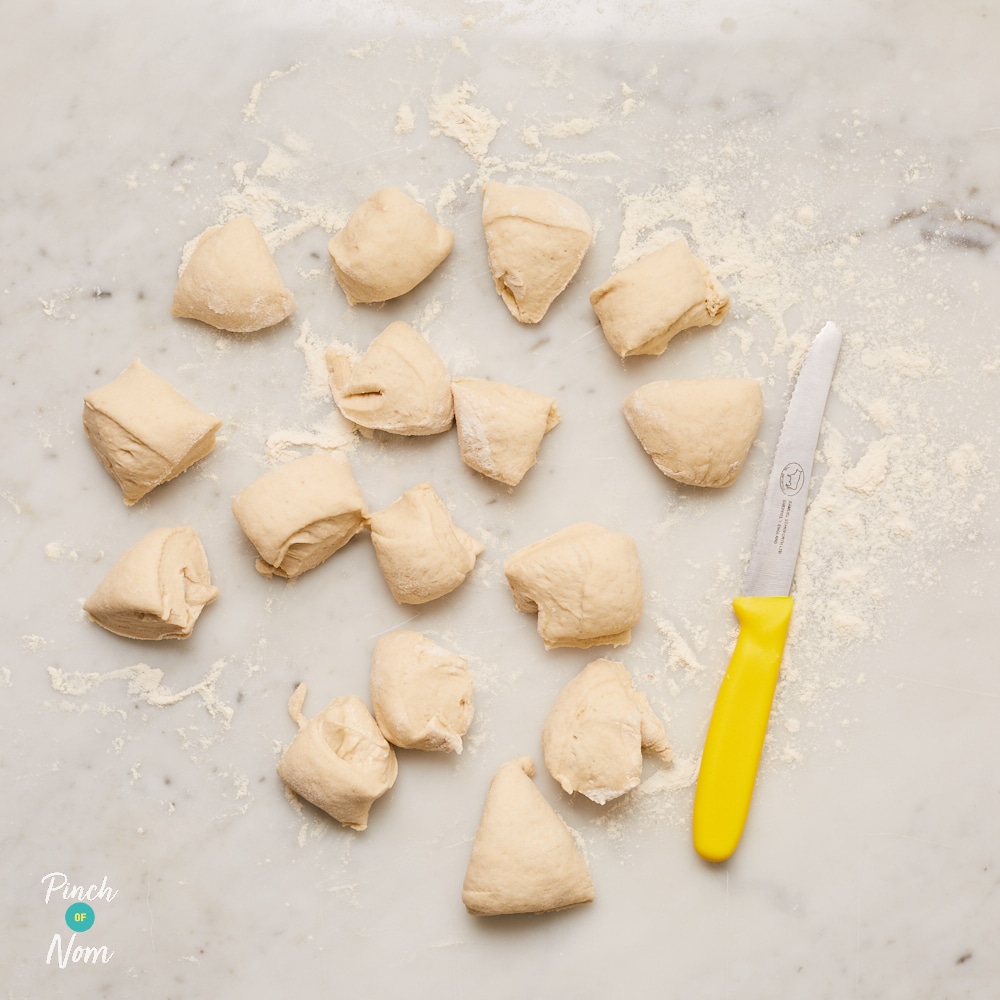
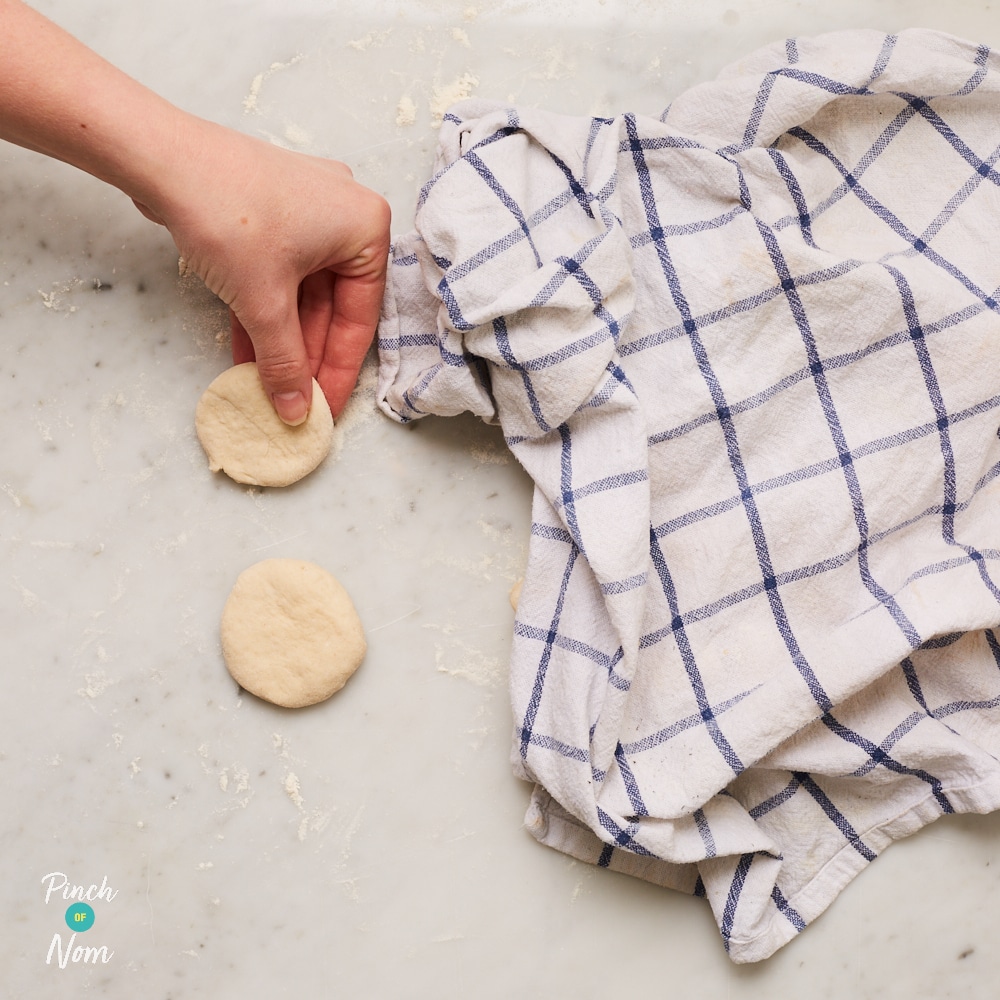
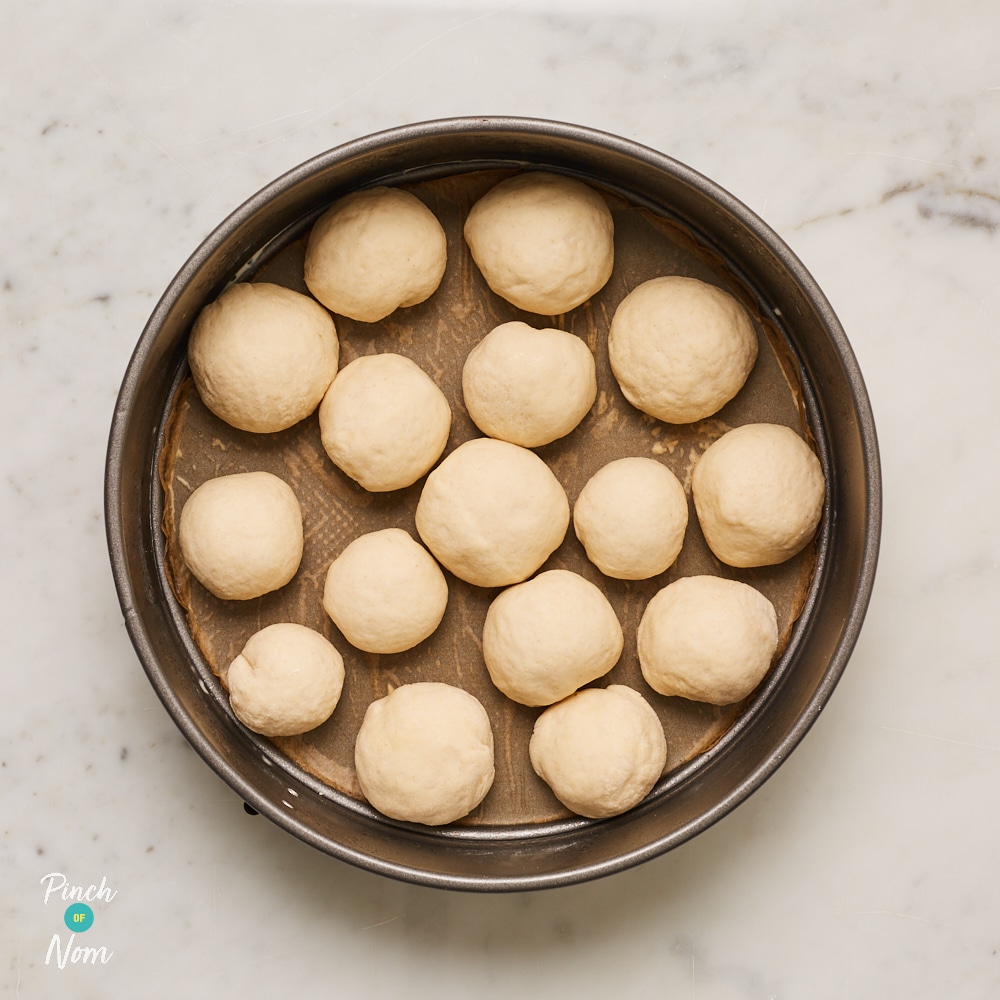
Using a large sharp knife, cut the ball of dough into 16 equal sized pieces. Take the first piece of dough, place it on the work surface and flatten it into a round with your hands. You can cover the other pieces of dough with a clean, slightly damp tea towel or cling film while you shape and stuff the dough balls with mozzarella. This will prevent them drying out while you work.
Step 8
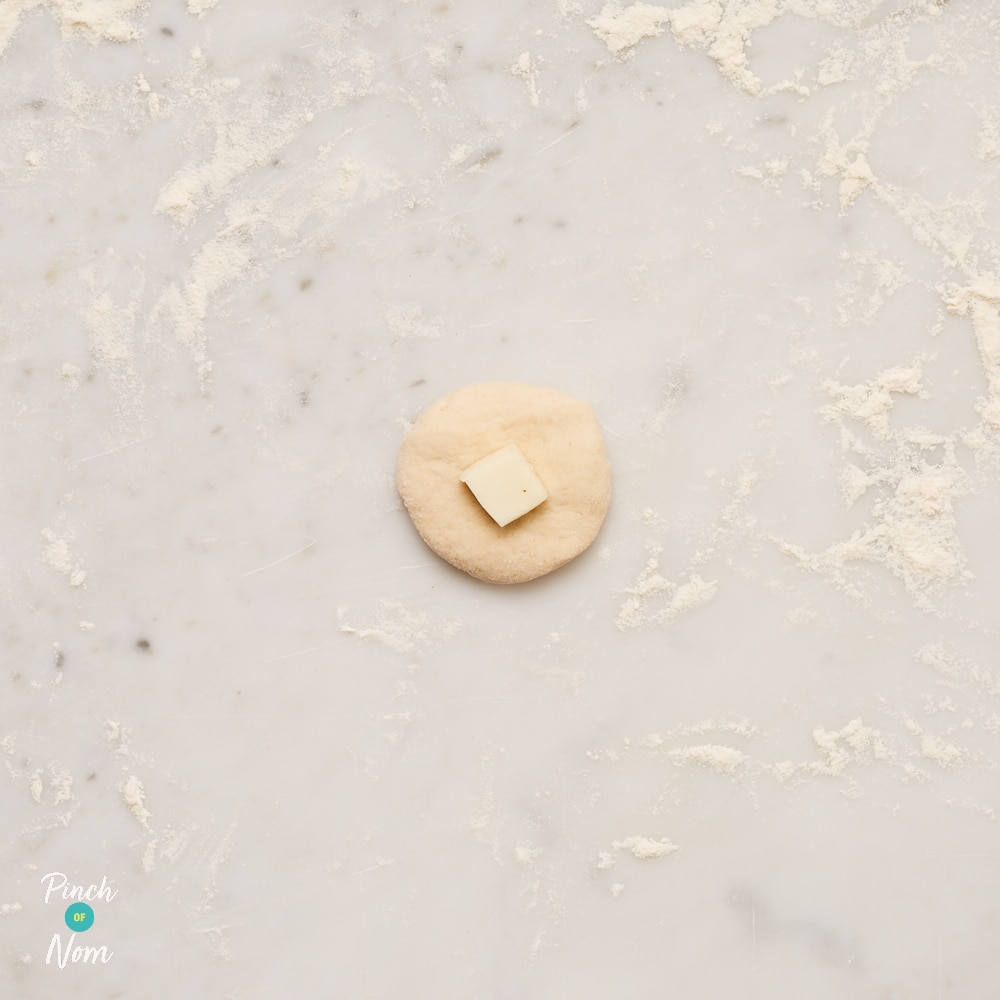
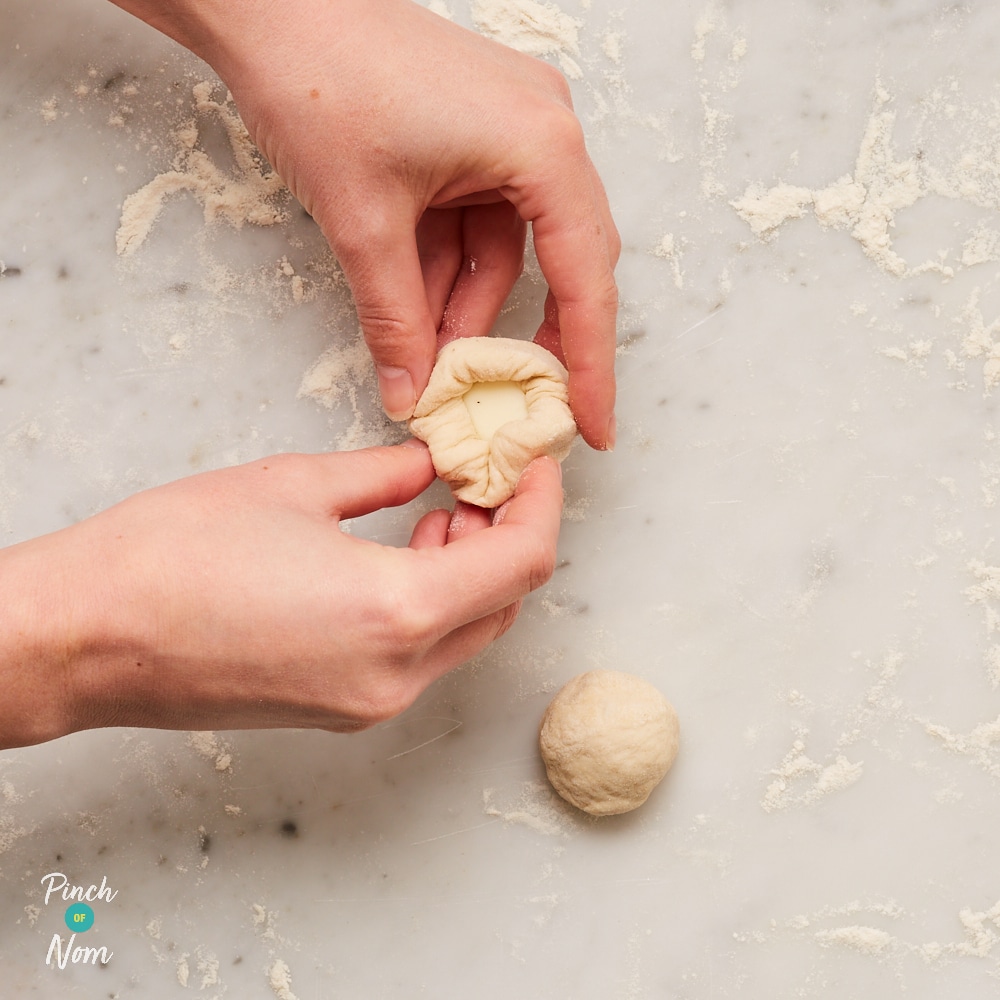
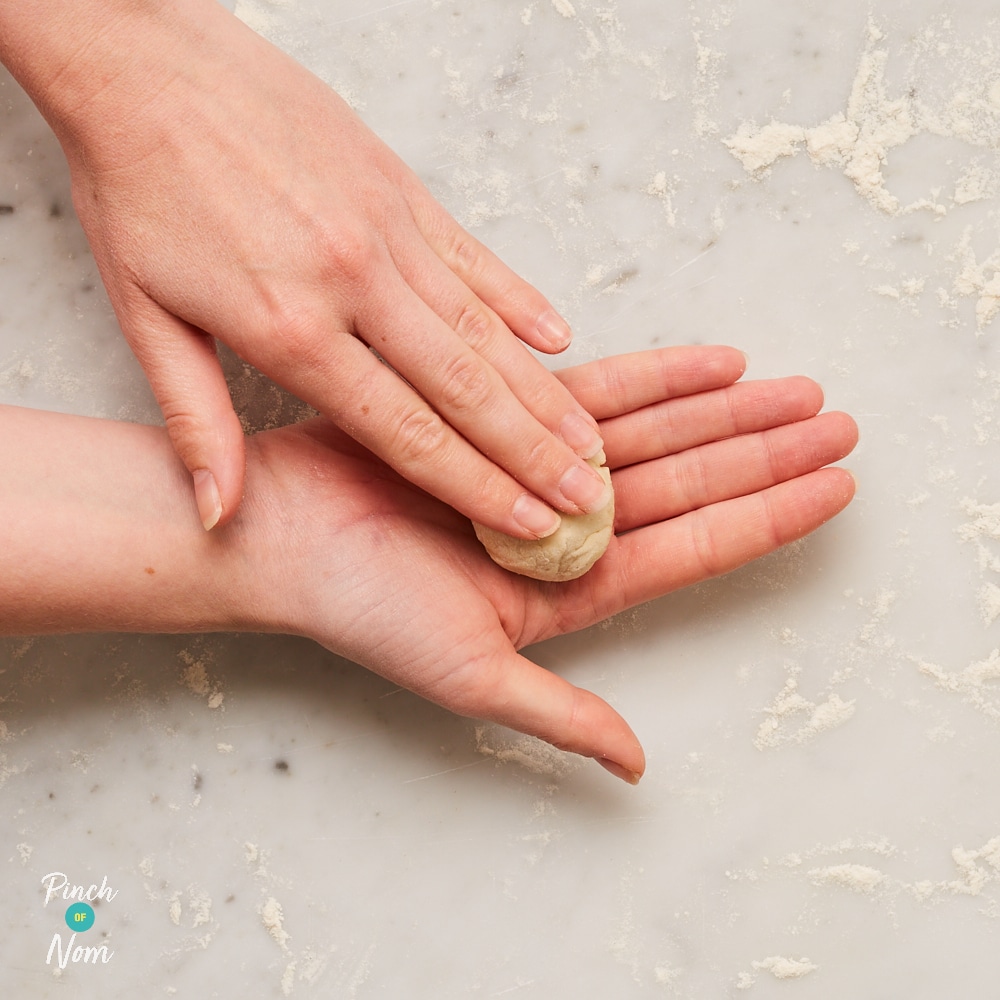
Place a 1cm cube of mozzarella in the centre of the flattened round of dough. Fold the edges in to seal the mozzarella inside the dough ball pinching firmly to seal. Gently roll in your hands to make a smooth ball. Repeat this process until you have made 16 dough balls.
Step 9
Place all the dough balls seam side down in the prepared tin, setting them closely together. Cover with a plate and put them in a warm place to prove for a further 30 minutes, until they are puffy when pressed, have increased in size and are joining together.
Step 10
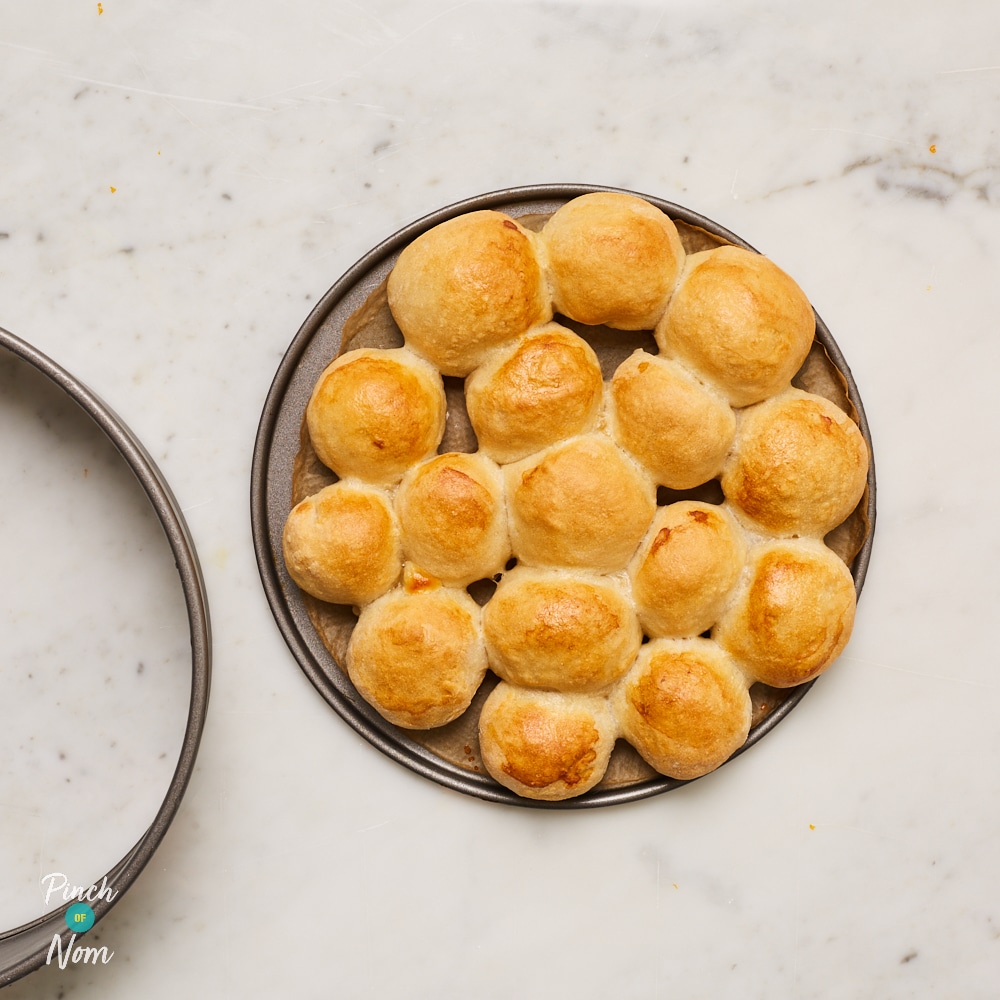
Remove the plate and place in the preheated oven for 10-12 minutes until golden and joined together. The dough ball round should sound hollow when tapped on the bottom.
Step 11
Remove from the oven. To remove the dough ball round from the tin: place a jug upside down on the work surface. Hold each side of the rim of the tin; the tin will be hot so use a tea towel or oven gloves. Place the tin on top of the upturned jug and gently push down. The outer rim of the tin will drop down and release the dough ball round on the loose bottomed base.
Step 12
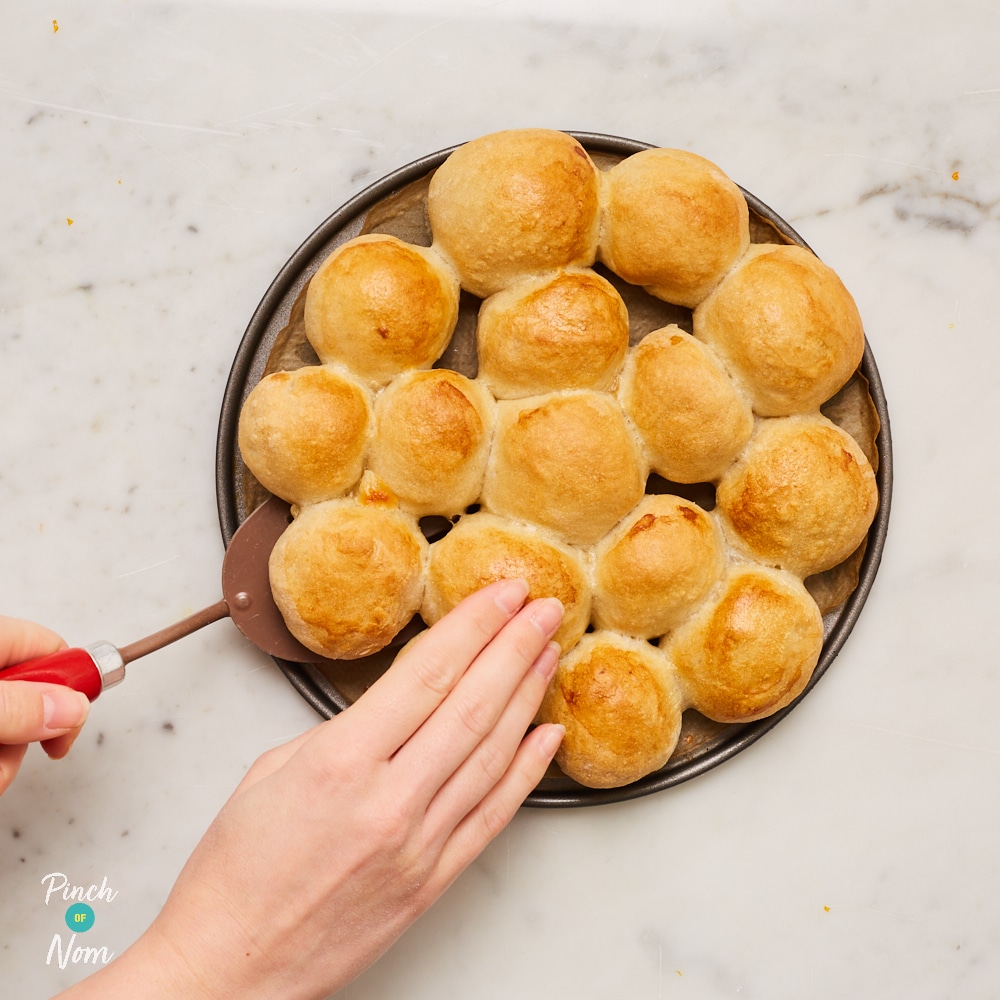
Place the dough ball round, (still on the base of the tin) on the work surface. Use a fish slice to lift the dough ball round off the baking paper and base of the tin. Transfer to a large serving plate.
Step 13
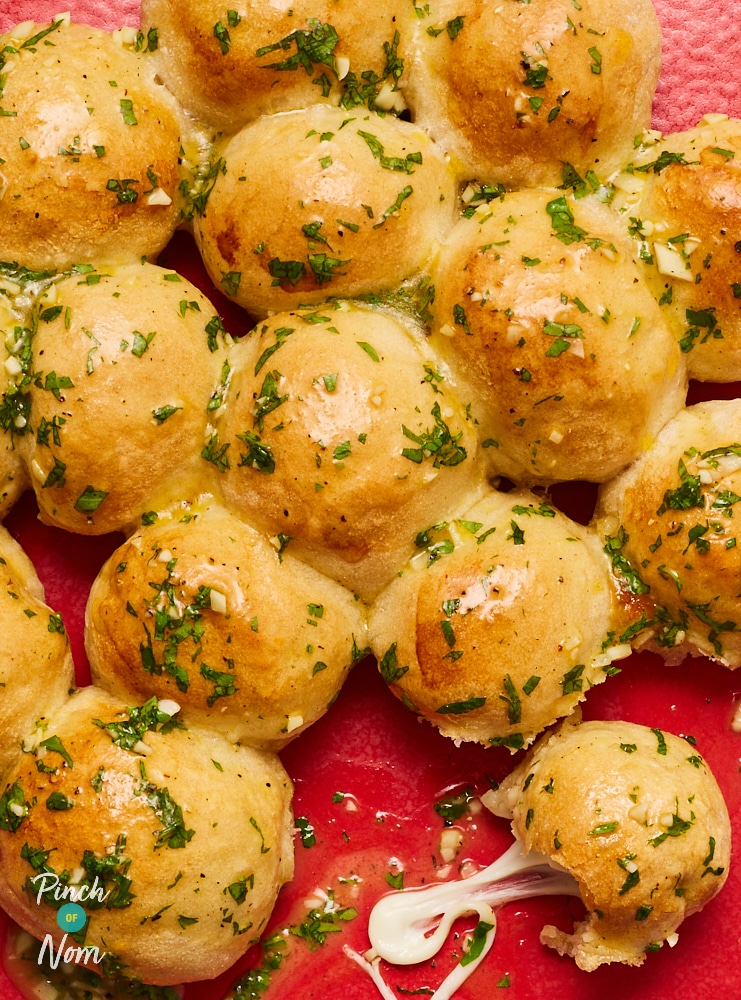
Remove the garlic ‘butter’ from the fridge and microwave for about 20 seconds until just melted. Spoon over the hot dough ball round to coat completely and serve at once.

What could I serve with these Tear & Share Cheesy Garlic Dough Balls?
These Tear & Share Cheesy Garlic Dough Balls are delicious as a snack, but they can also be served as a side dish alongside an Italian themed feast!
Why not pair with some of the following recipes:


How do you know when Tear & Share Cheesy Garlic Dough Balls are cooked?
You should cook these Tear & Share Cheesy Garlic Dough Balls until they have all joined together and turned golden brown. This will take around 10-12 minutes. When you remove them from the oven, they should sound hollow when tapped on the bottom.
To keep your family safe, the advice here in the UK is to cook food until it has reached 70°C and maintained that temperature for 2 minutes.
How long can you keep Tear & Share Cheesy Garlic Dough Balls in the fridge?
Once you’ve served this recipe, you’ll ideally need to eat it within 4 hours.
You can store any leftover Tear & Share Cheesy Garlic Dough Balls in the fridge for 1 or 2 days. Make sure that you allow them to cool before putting them in a container with a lid and chilling in the refrigerator.
Can I freeze Tear & Share Cheesy Garlic Dough Balls?
The dough balls CAN be frozen, but the garlic ‘butter’ is not suitable for freezing. Make this freshly each time for the best flavour.
If freezing the dough balls, please do remember to do the following:
- Make sure that you freeze them as soon as they are cold enough.
- Choose a container or a bag that is suitable for freezing.
- Label your dish with the name of the recipe and the date that you froze it on.
How do I reheat Tear & Share Cheesy Garlic Dough Balls?
From chilled: Reheat the dough balls in a moderate oven until they are piping hot. Alternatively, place in a microwavable container with a loosely fitting lid and heat for 20 seconds – 1 minute depending on the power of your microwave and the number of dough balls you’re reheating.
From frozen: Allow to defrost overnight in the fridge and reheat following the instructions above.
ORDER Our NEW cookbook Slow Cooker NOW
Tear & Share Cheesy Garlic Dough Balls
These Tear & Share Cheesy Garlic Dough Balls are too good to be true. Not only are they drizzled in garlic butter, they’re also stuffed with gooey mozzarella cheese!
-
Prep Time
30 MINS
-
Cook Time
12 MINS
- KCals 74
- Carbs 12G
Instructions
- Make the garlic 'butter’: Place the reduced fat spread, garlic, parsley, salt and black pepper in a small bowl. Stir until well mixed then place in the fridge while you make the dough balls.
- Make the dough balls: Spray a 23cm round loose bottomed cake tin with low calorie cooking spray and use to grease the tin. Line the base with a disc of non-stick baking paper. Sift the flour into a large mixing bowl. Stir in the yeast, caster sugar and salt until evenly mixed.
- Add the warm water and mix with a round bladed knife until the dough starts to come together. Use clean hands to press the dough together into a ball, then turn out onto a lightly floured surface.
- Knead the dough for 10 minutes, until smooth and elastic. Spray a clean, large mixing bowl with a little low calorie cooking spray and use to thoroughly grease the bowl.
- Place the dough, seam side down in the greased bowl and cover with a plate. Put it in a warm place to prove for 1 hour until the dough has at least doubled in size and feels puffy when pressed. Preheat the oven to 200ºC after the dough has been proving for 45 minutes.
- Turn the dough out onto the surface and lightly knead just four or five times. Form into a smooth ball placing seam side down on the surface.
- Using a large sharp knife, cut the ball of dough into 16 equal sized pieces. Take the first piece of dough, place it on the work surface and flatten it into a round with your hands. You can cover the other pieces of dough with a clean, slightly damp tea towel or cling film while you shape and stuff the dough balls with mozzarella. This will prevent them drying out while you work.
- Place a 1cm cube of mozzarella in the centre of the flattened round of dough. Fold the edges in to seal the mozzarella inside the dough ball pinching firmly to seal. Gently roll in your hands to make a smooth ball. Repeat this process until you have made 16 dough balls.
- Place all the dough balls seam side down in the prepared tin, setting them closely together. Cover with a plate and put them in a warm place to prove for a further 30 minutes, until they are puffy when pressed, have increased in size and are joining together.
- Remove the plate and place in the preheated oven for 10-12 minutes until golden and joined together. The dough ball round should sound hollow when tapped on the bottom.
- Remove from the oven. To remove the dough ball round from the tin: place a jug upside down on the work surface. Hold each side of the rim of the tin; the tin will be hot so use a tea towel or oven gloves. Place the tin on top of the upturned jug and gently push down. The outer rim of the tin will drop down and release the dough ball round on the loose bottomed base.
- Place the dough ball round, (still on the base of the tin) on the work surface. Use a fish slice to lift the dough ball round off the baking paper and base of the tin. Transfer to a large serving plate.
- Remove the garlic 'butter' from the fridge and microwave for about 20 seconds until just melted. Spoon over the hot dough ball round to coat completely and serve at once.
Looking for Slimming World Syns or Weight Watchers (WW) Points?
With ever-changing plans and point calculations, we have made the decision to remove WW Points from the website - referring to your individual plan or advice from your consultant is always going to give the most accurate results.
—
We agreed with Slimming World to remove their trademarked terms from our website
Recipe notes
We love seeing your photos! If you’ve tried these Tear & Share Cheesy Garlic Dough Balls, don’t forget to tag us in your pics!


10 comments
See what others have to say
Trudie CarterSunday 5th June 2022
How do I save this recipe please?
HollyMonday 6th June 2022
Hey Trudie, we have a handy guide HERE which talks through how to save recipes, hope that helps!
Catherine DickieWednesday 4th May 2022
Is 1 doughball a serving ? So it serves 16 people at 74 calories each ?
HollyWednesday 4th May 2022
Hey Catherine, yes the recipe makes 16 dough balls and nutritional information is per dough ball, hope that helps!
DanielleSunday 20th February 2022
Is this recipe in your new ‘comfort food’ book?
HollyMonday 21st February 2022
Hi Danielle, this recipe is exclusive to our website so doesn’t appear in any of our books. We have an article HERE which talks through how to save your favourite recipes so you can find them quickly next time. Hope that helps!
SarahSaturday 19th February 2022
What GF flour can you use for this self raising or plain and can you use any other cheese in place of mozzarella? TIA
SharonMonday 21st February 2022
Hi Sarah, this recipe hasn’t been developed using gluten free flour so we can’t guarantee you’ll have a successful result. Bread making using gluten free flour can be challenging because gluten helps the dough to stretch and rise. If you decide to go ahead, you should try using a gluten free white bread flour (Doves Farm make one), rather than a gluten free self raising or plain flour. You will probably need to add more water as gluten free flours require more liquid. If you want to use a different cheese, you could try Cheddar, Gruyere, Gouda, Babybel or any other cheeses that melt well. Hope this helps.
Bridget PrenticeThursday 17th February 2022
How many people does this recipe serve? And what is a ‘serving’ in terms of calories?
Thanks
Bridget
HollyFriday 18th February 2022
Hey Bridget, this recipe makes 16 tear and share balls and we have worked out the calories per ball. Hope that helps!
Join the conversation
Comment or ask our advice