

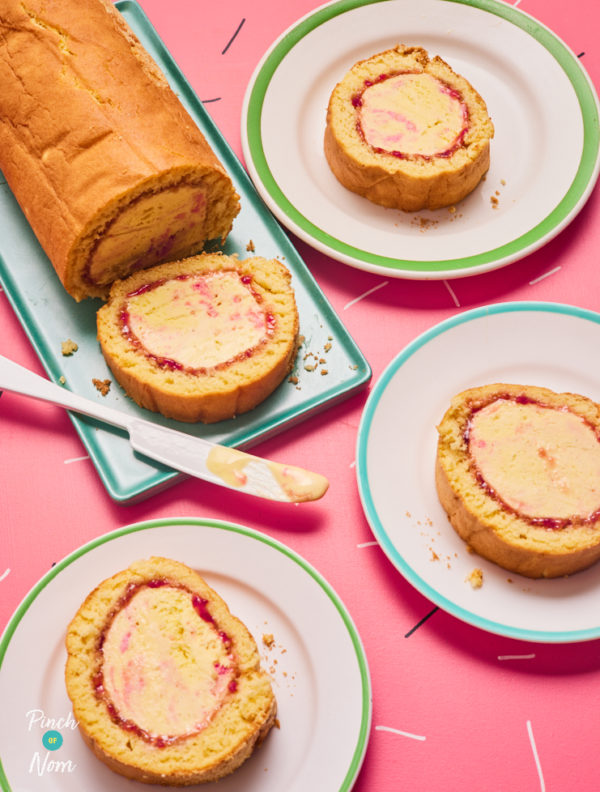
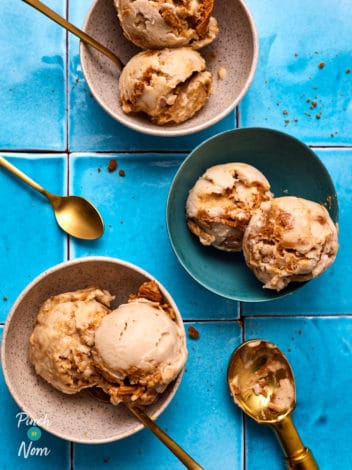
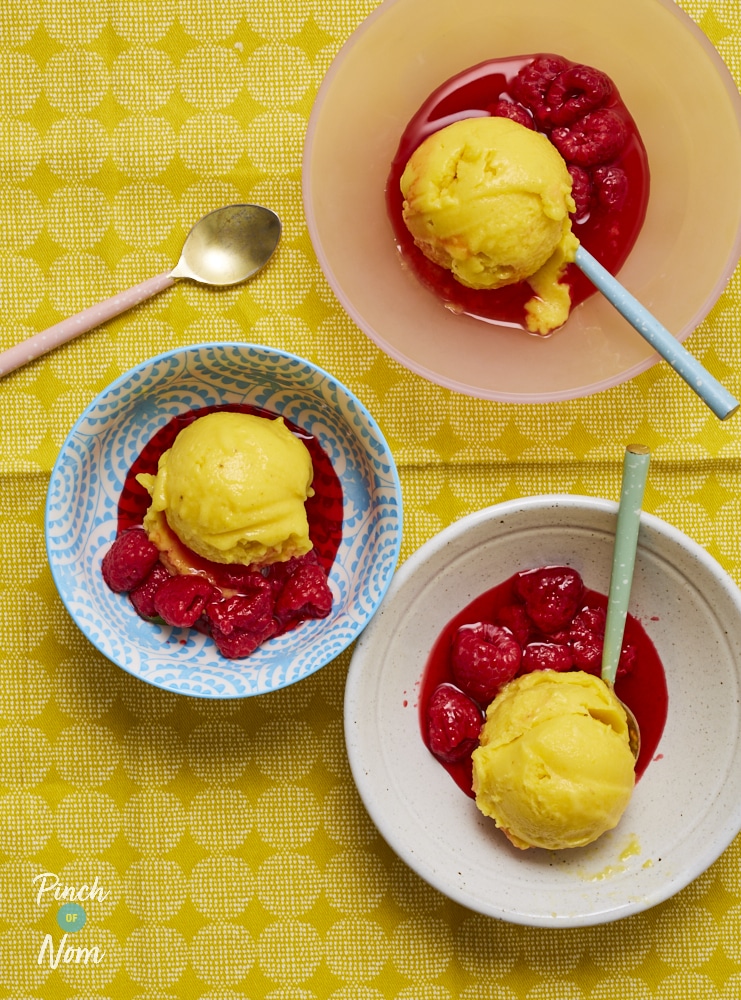
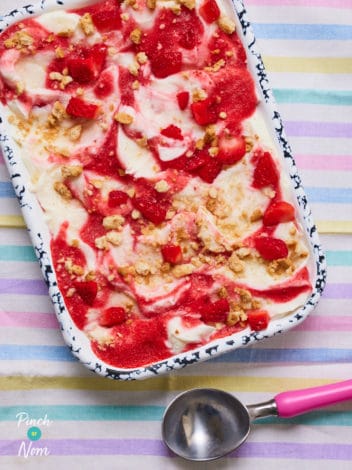
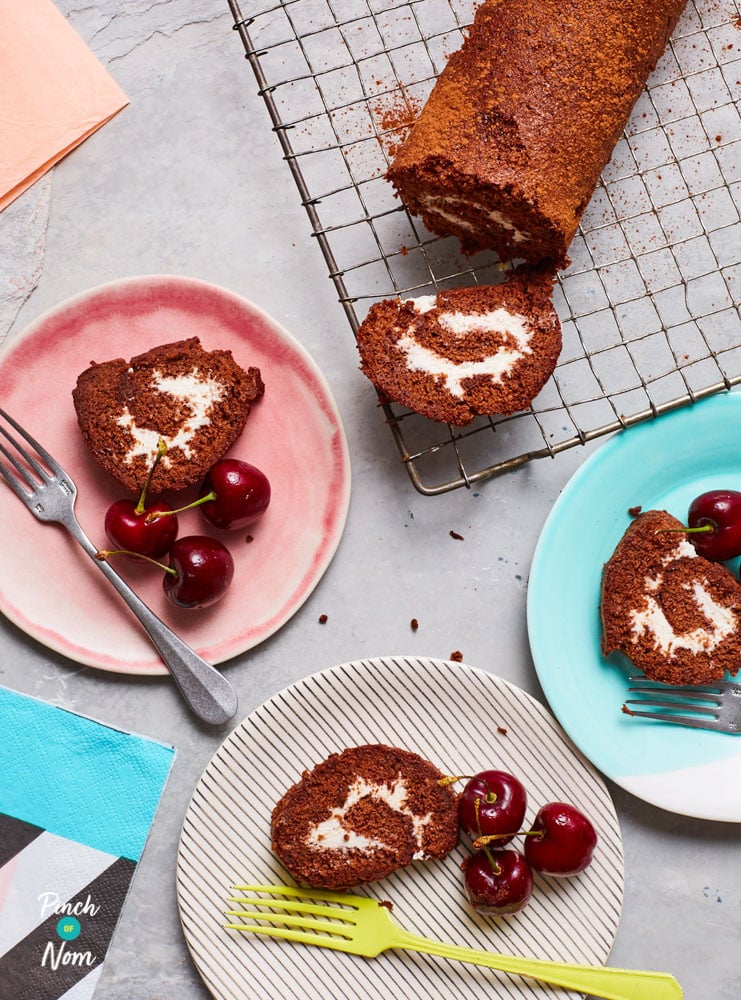
Raspberry Ripple Arctic Roll
If you like your desserts retro, fruity and frozen, this is the recipe for you! Our Raspberry Ripple Arctic Roll is a slimming-friendly version of the classic British frozen pud, where we’ve levelled up the flavour by making our own juicy raspberry puree to swirl through reduced-fat vanilla ice cream. Rolled up inside a light, airy, fatless sponge, it’s just 141 calories per slice!
Also in these categories:


NutritionPer Serving
- Calories141
- Carbs26g
- Protein4.4g
- Fat3.5g
- Saturates1.4g
- Sugars16g
For the full list of ingredients and comprehensive instructions, please see the recipe card below. Before you scroll, there’s important stuff in the blurb!
Since it first appeared in the 1950s, arctic roll has been a popular British pud, and it’s easy to understand why! There’s never a bad time to tuck into a slice of sponge cake-wrapped ice cream, although the calories in a shop-bought or restaurant version can often be quite high.
There’s no such problem with our Raspberry Ripple Arctic Roll recipe – we’ve made a few nifty (and barely noticeable) swaps to keep things slimming friendly.
It’s well worth the extra step of making your own raspberry puree from fresh fruit, rather than buying a raspberry ripple ice cream. Swirling the fresh puree through reduced-fat vanilla ice cream boosts the flavours, and it makes such a welcome difference to the finished pud.
Wrap the ice cream inside our easy-to-bake fatless sponge and you’re onto a winner! We highly recommend freezing it in individual portions, so you always have a slice on standby when you fancy something sweet to eat!
What diets is this Raspberry Ripple Arctic Roll suitable for?
Raspberry Ripple Arctic Roll can be enjoyed on a vegetarian diet. It can also be made suitable for dairy-free diets, as long as you substitute the ice cream for a suitable dairy-free alternative.
If you’re cooking for people with allergies, please be extra careful when checking ingredients and preparing food!
Do you need any special ingredients to make Raspberry Ripple Arctic Roll?
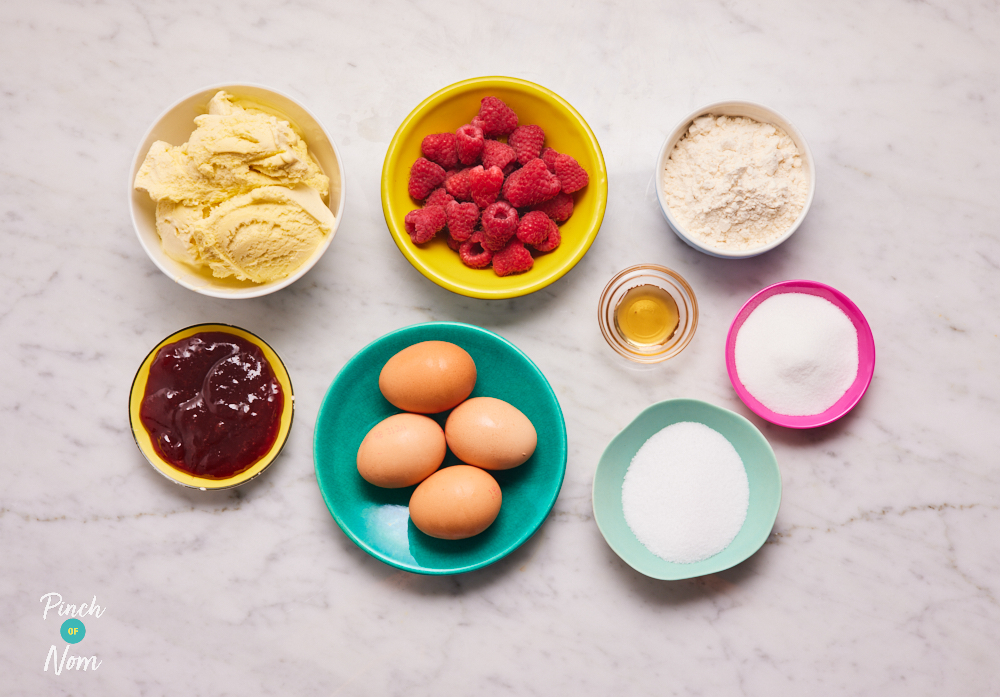
You won’t need any special ingredients to make this recipe, although there are a few bits of equipment that will make it easier. Along with a 32.5cm x 22.5cm Swiss roll tin, you’ll need an electric whisk and either a food processor or stick blender.
Send us a Hint or Tip
We love hearing from you, submit any tips or tricks you have for this dish and we’ll review them and add some of them here. Just click here.
SEND US a HINT & TIP, Or QUOTE for this recipe
THANKS
we have your picture
The process
- Check
Now we have your Hint & tip
we’ll check them over. - Review We’ll review your Hint & Tip, and see if its suitable to use on the website.
Your details
- Name: %name%
- Recipe: %recipeName%
YOUR HINTS & TIPS
Your “QUOTE”
SWAG!
Due to the large number of submissions we recieve we’re afraid we’ll only inform you if we use it on the Recipe page - then we’ll send you some swag…
(Please remember others may of had the same idea as you!)
This post contains affiliate links: what this means
This Lakeland Bakeware Swiss Roll Oven Tray Baking Tin is the perfect size for baking all kinds of light and airy sponge cakes.
You’ll need an electric whisk to beat your cake mixture to the right consistency. This would be very difficult to mix by hand.
How many calories are in this Raspberry Ripple Arctic Roll?
There are 141 calories per portion in this Raspberry Ripple Arctic Roll recipe, which means it falls into our Everyday Light recipe category. If you’re counting calories or following one of the popular diet plans like Weight Watchers, this recipe fits in perfectly!
NHS guidelines suggest men should aim for 2,500 calories per day to maintain a healthy body weight, and women require around 2000 calories. Each person has different calorie requirements depending on their goal, so you may want to adjust your daily calorie intake according to your own personal goal.
Step 1
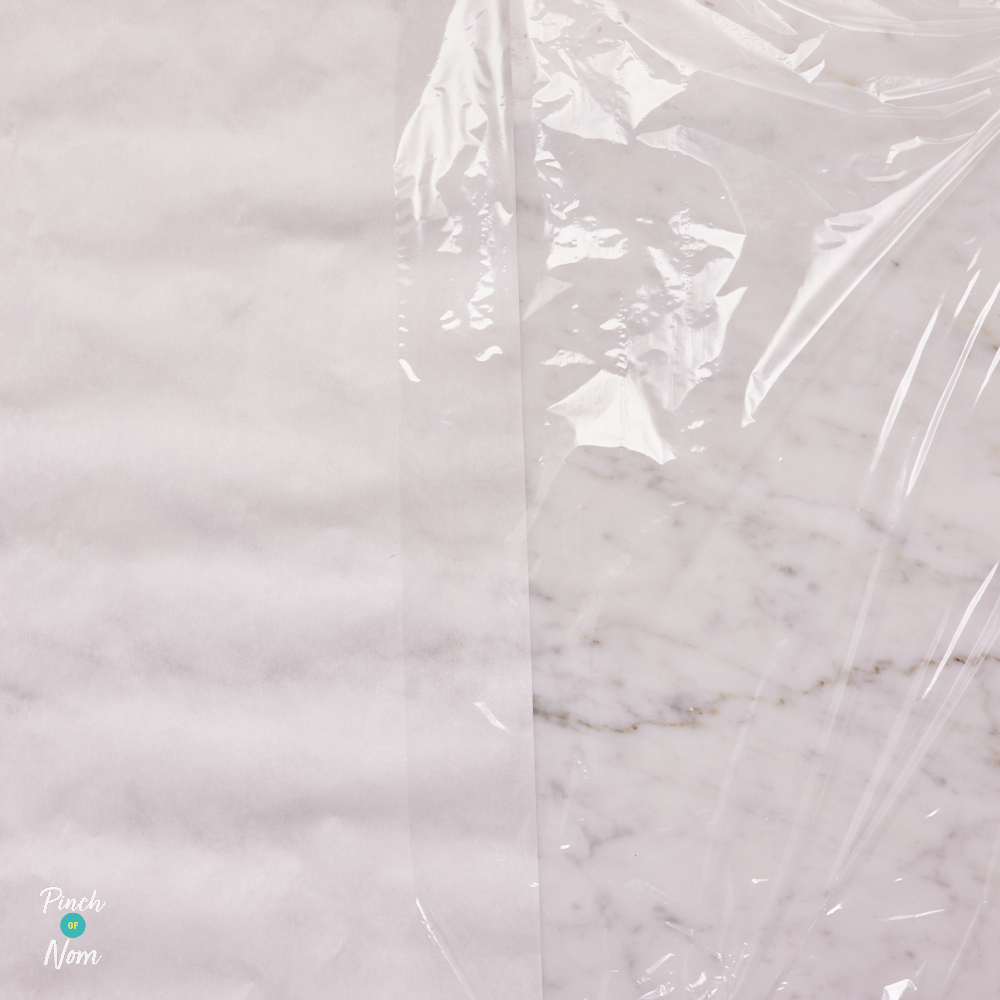
Cut a sheet of non-stick baking paper and a sheet of cling film from the roll, each approximately 50cm in length. Lay each sheet out separately on the work surface.
Step 2
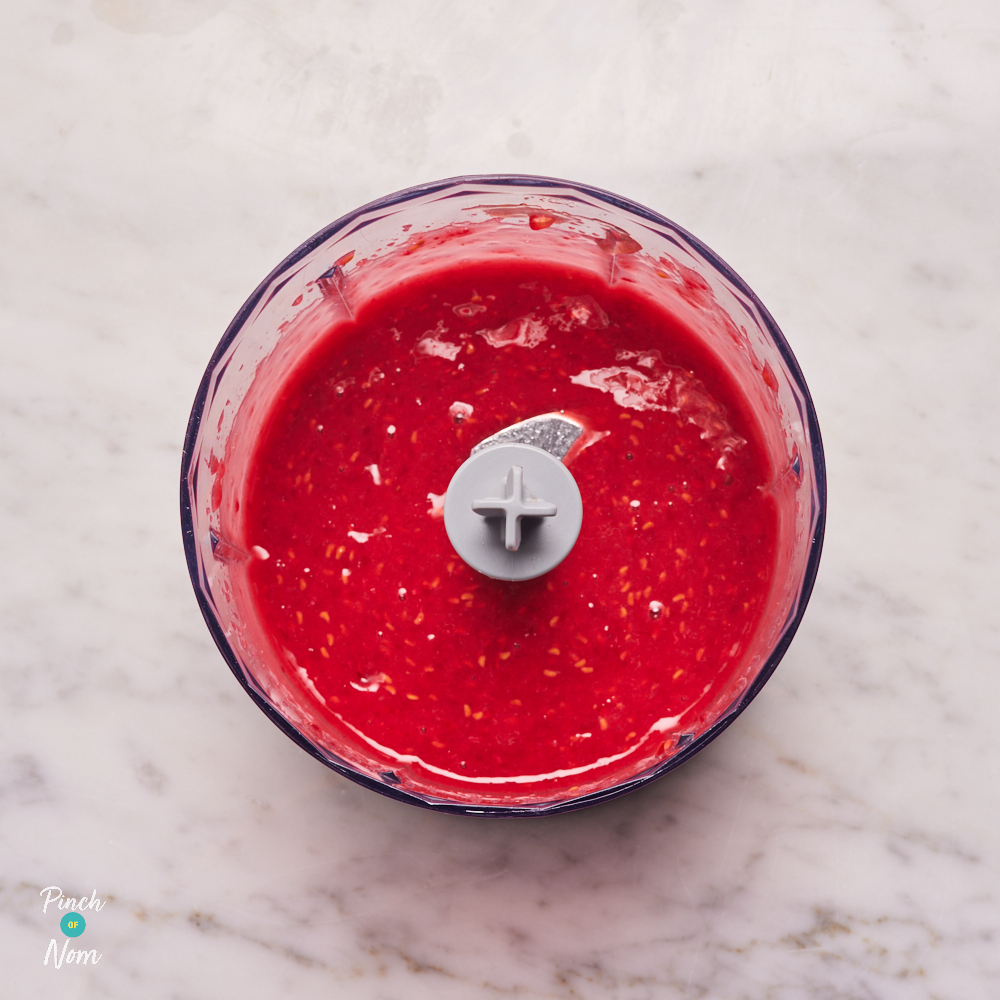
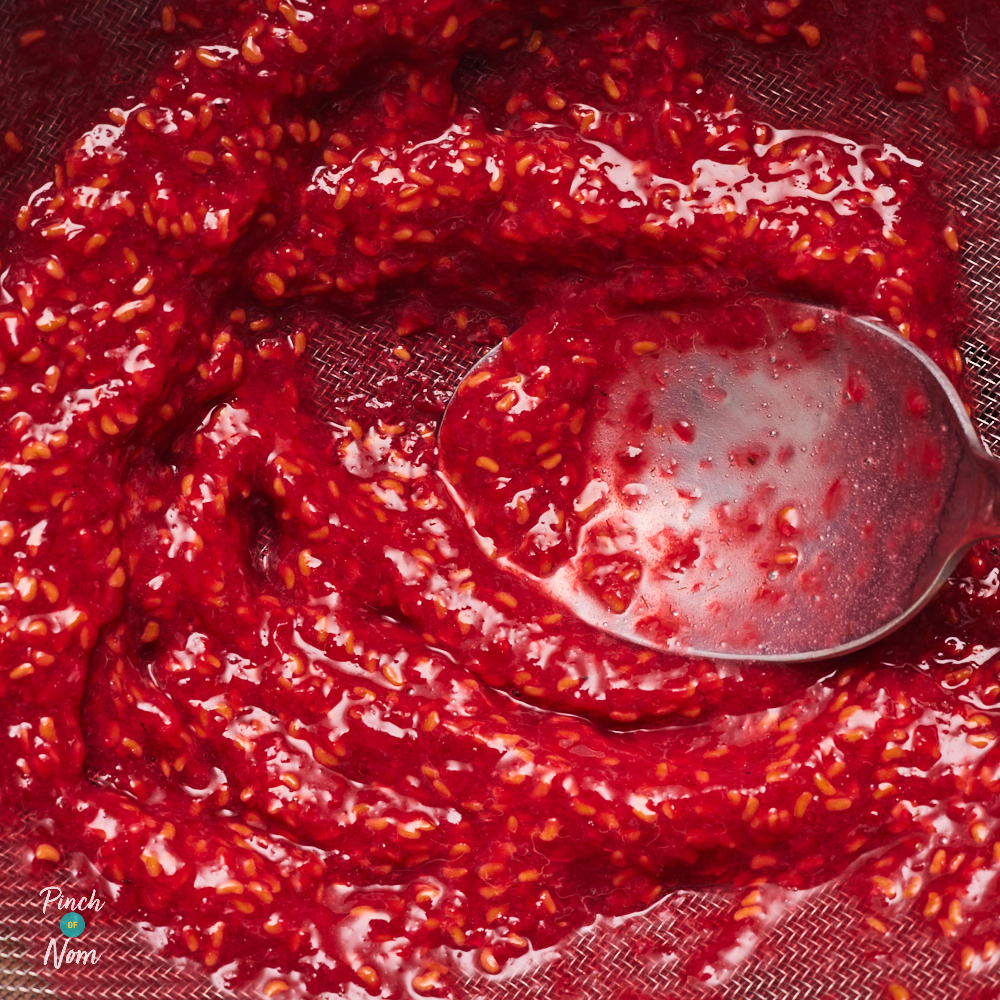
Place the raspberries and 2 tbsp of jam in a food processor, or use a stick blender to blitz into a smooth puree. Push the puree through a nylon sieve into a small bowl to remove the pips. Discard the pips.
Step 3
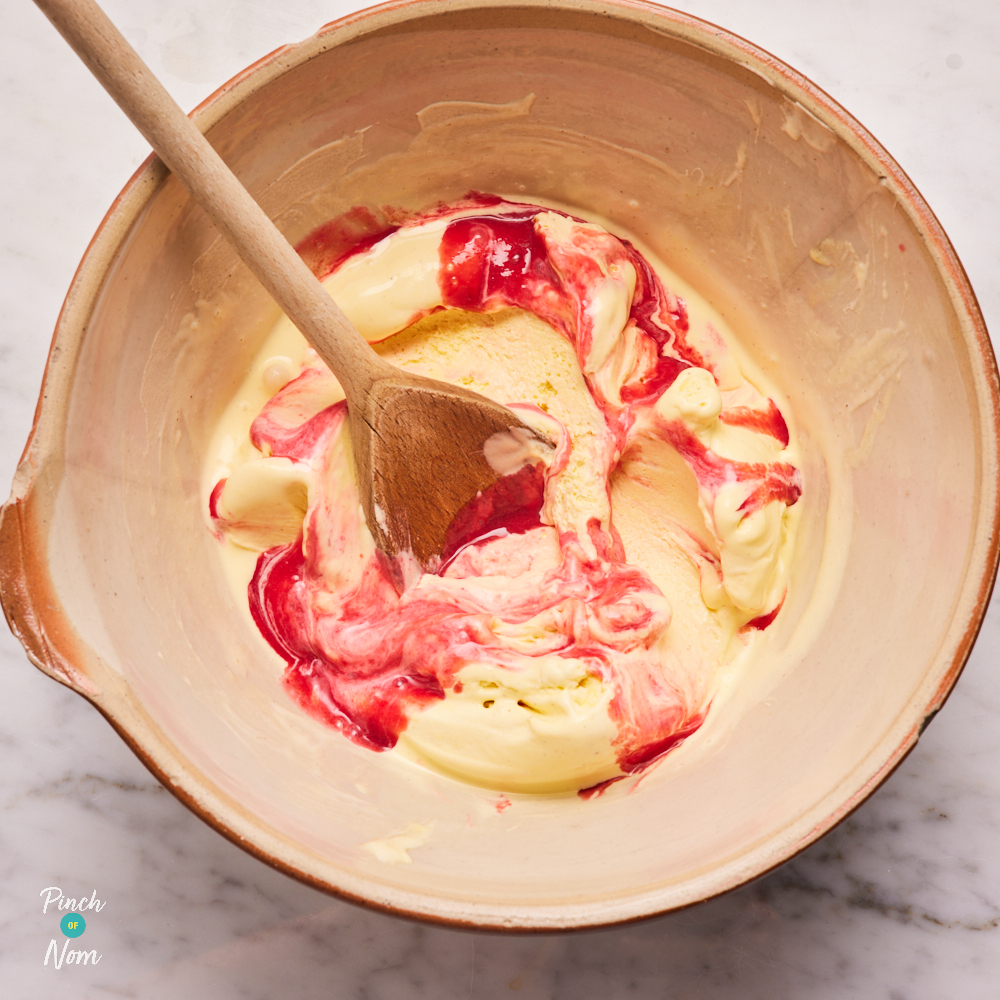
Place the ice cream in a large bowl and break up a little with a wooden spoon. Leave to soften slightly for 5 minutes, taking care not to let it melt too much; it should be just softened enough to be able to stir in the raspberry puree. Add the raspberry puree and stir through the slightly softened ice cream with a large spoon, to create a rippled effect. Take care not to overmix otherwise the vanilla ice cream will become completely pink.
Step 4
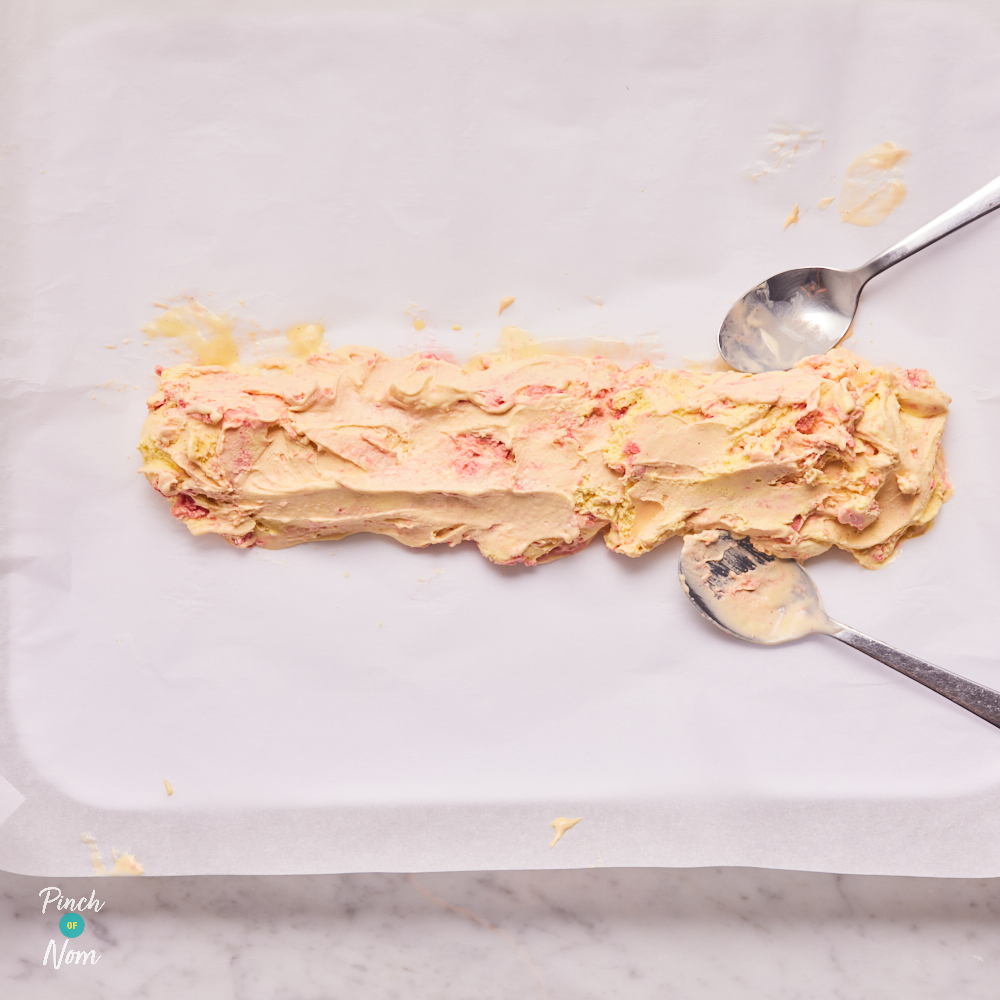
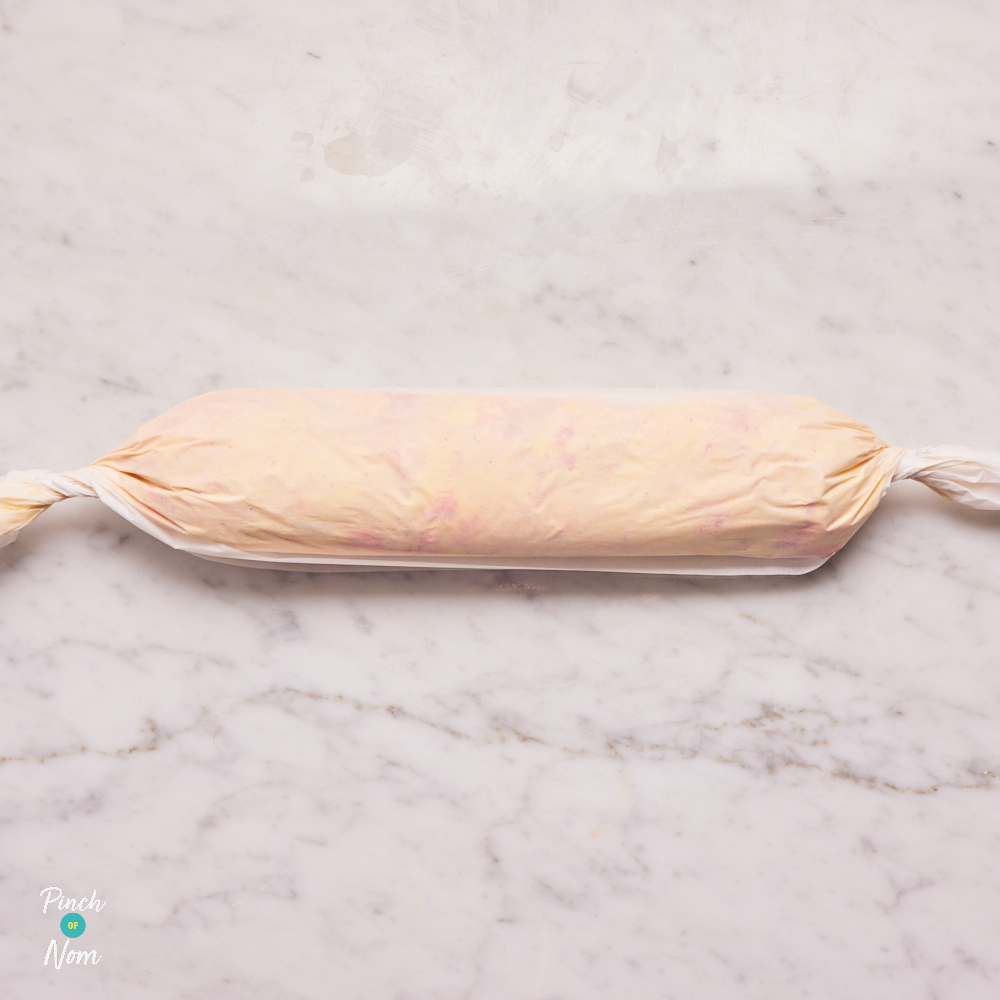
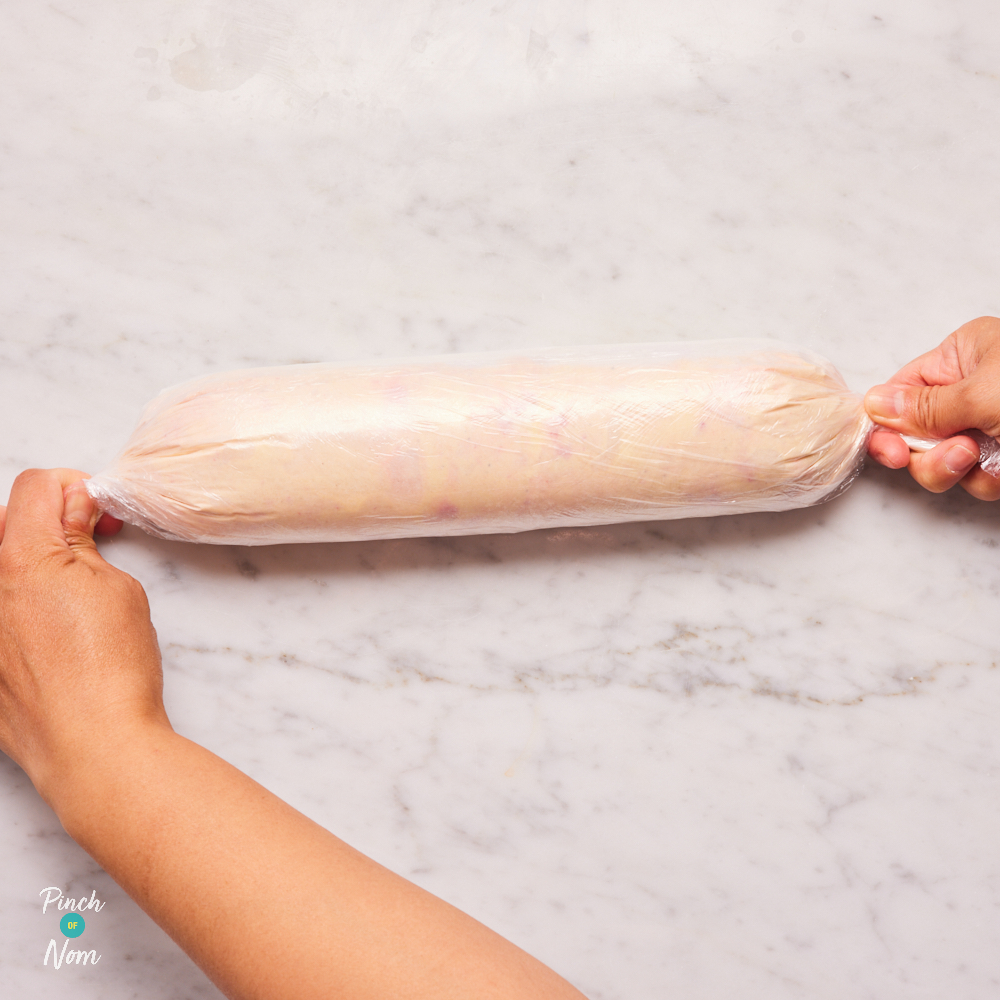
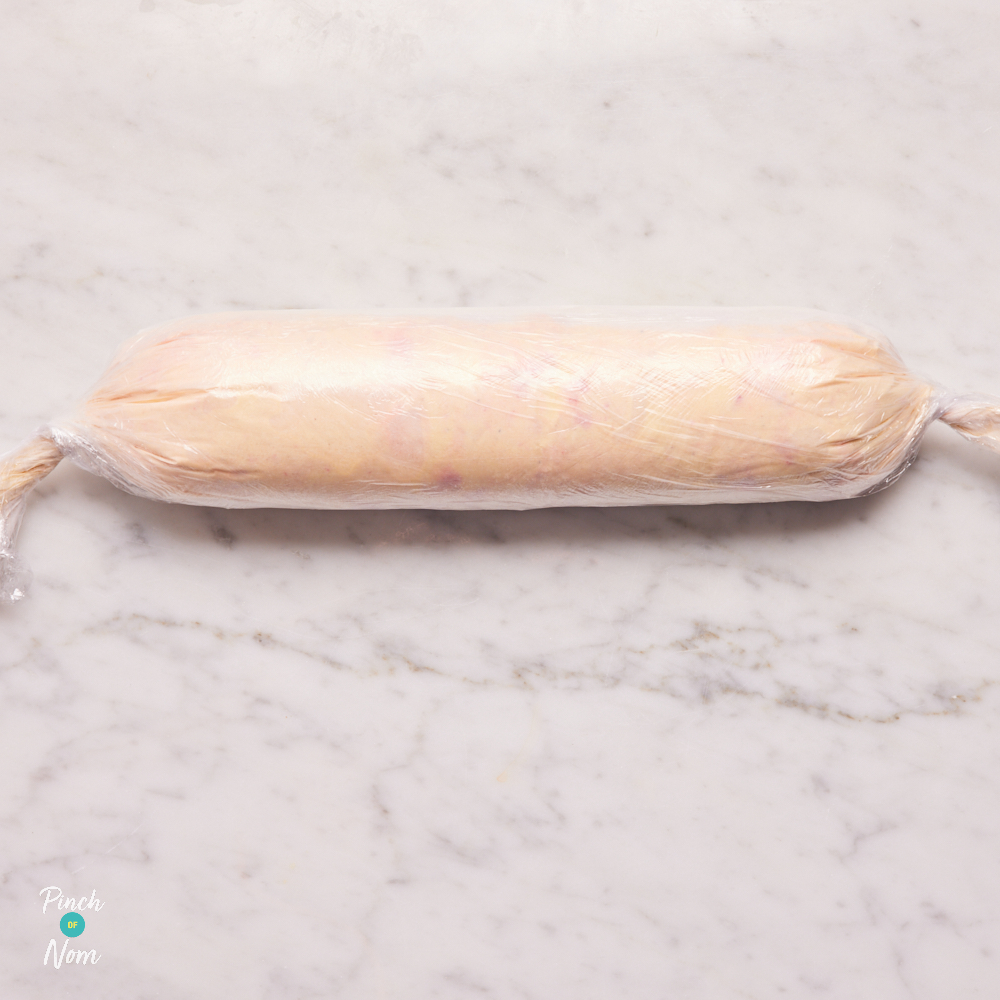
Working as quickly as possible, spoon the rippled ice cream lengthways down the centre of the non-stick baking paper sheet. Use two dessert spoons to roughly shape the ice cream into a 32cm long, 4cm diameter cylinder shape. Roll the ice cream cylinder up tightly in the non-stick baking paper sheet, and twist the ends to seal tightly. Place the wrapped roll lengthways down the centre of the cling film sheet and roll up tightly, twisting the ends to seal. Immediately place in the freezer and freeze for 1½-2 hours until completely solid.

Step 5
Meanwhile, make the sponge cake. Preheat the oven to 160°C. Grease a 32.5cm x 22.5cm Swiss roll tin with low-calorie cooking spray and line the base and sides with a sheet of non-stick baking paper.
Step 6
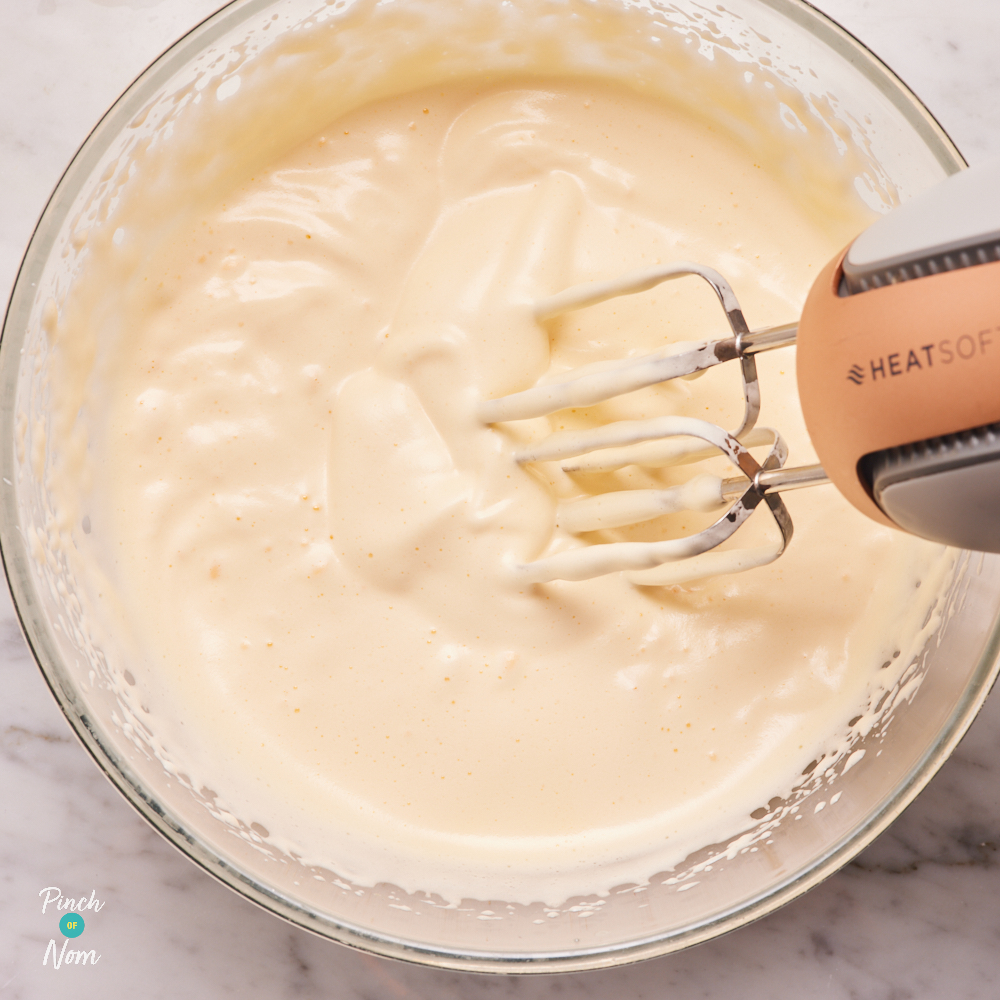
Place the eggs, granulated sweetener, caster sugar and vanilla extract in a large bowl. Use an electric whisk to whisk on high speed for 10 minutes until very thick, pale and creamy. The mixture should hold a ‘ribbon’ trail when the whisk is lifted out.
Step 7
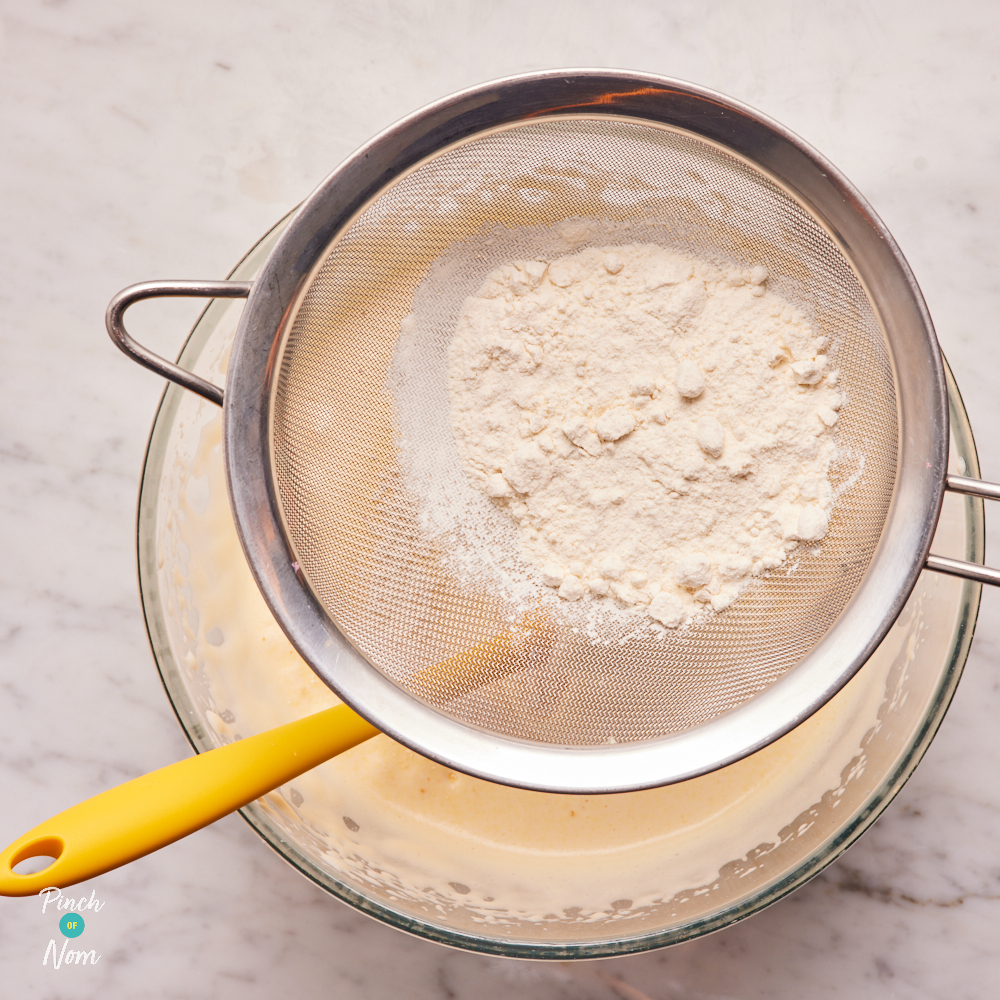
Sift the flour into the mixture a little at a time and use a large spoon to gently fold in until just combined. Take care not to overmix, otherwise you will knock out the air you have incorporated.
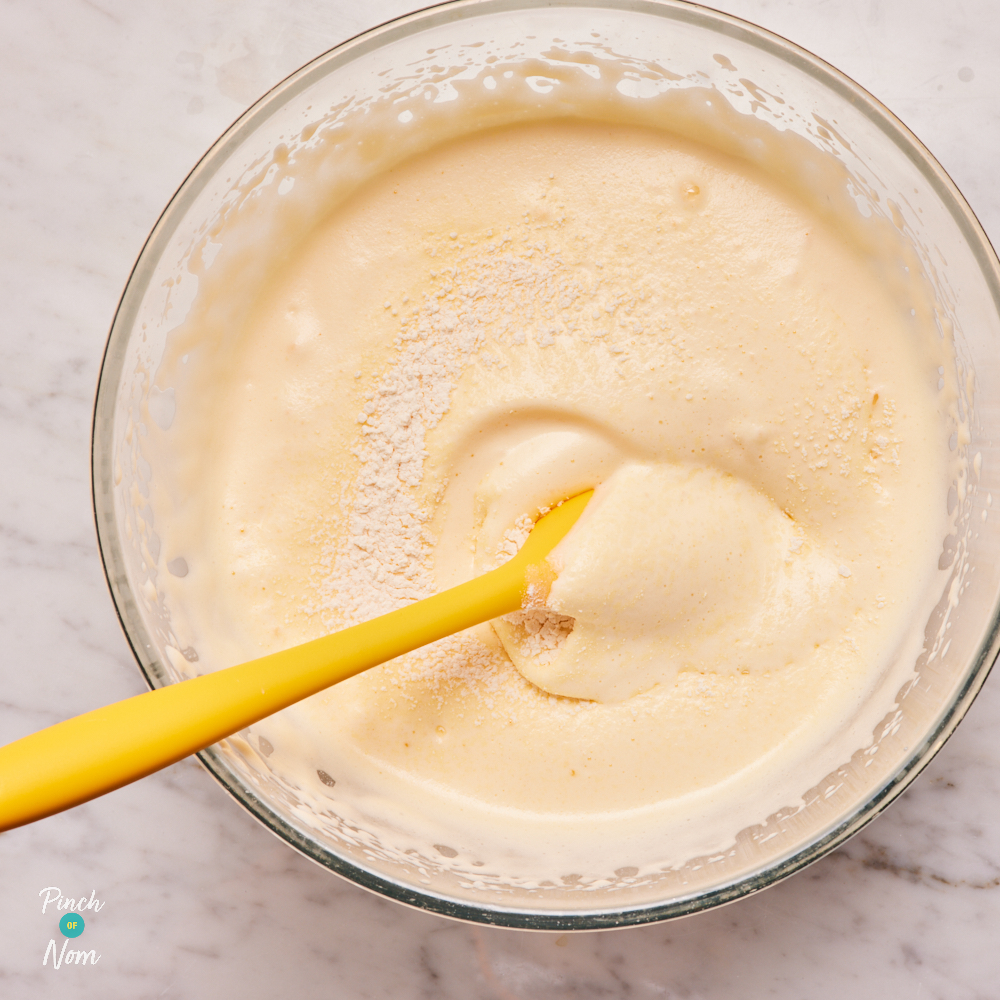
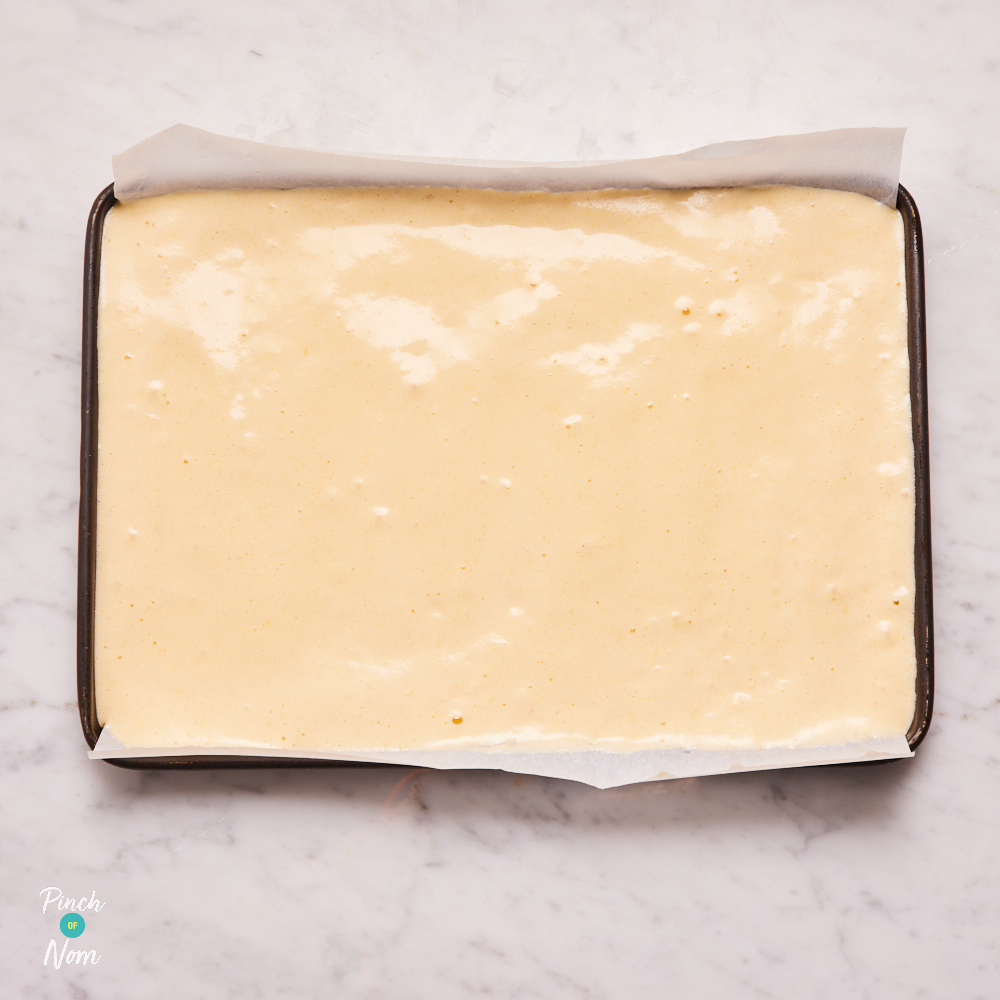
Step 8
Scrape into the prepared tin and gently spread out evenly. Place in the preheated oven for 10-15 minutes until golden. Gently press the centre of the sponge, it should spring back when it’s ready and leave no indent.
Step 9
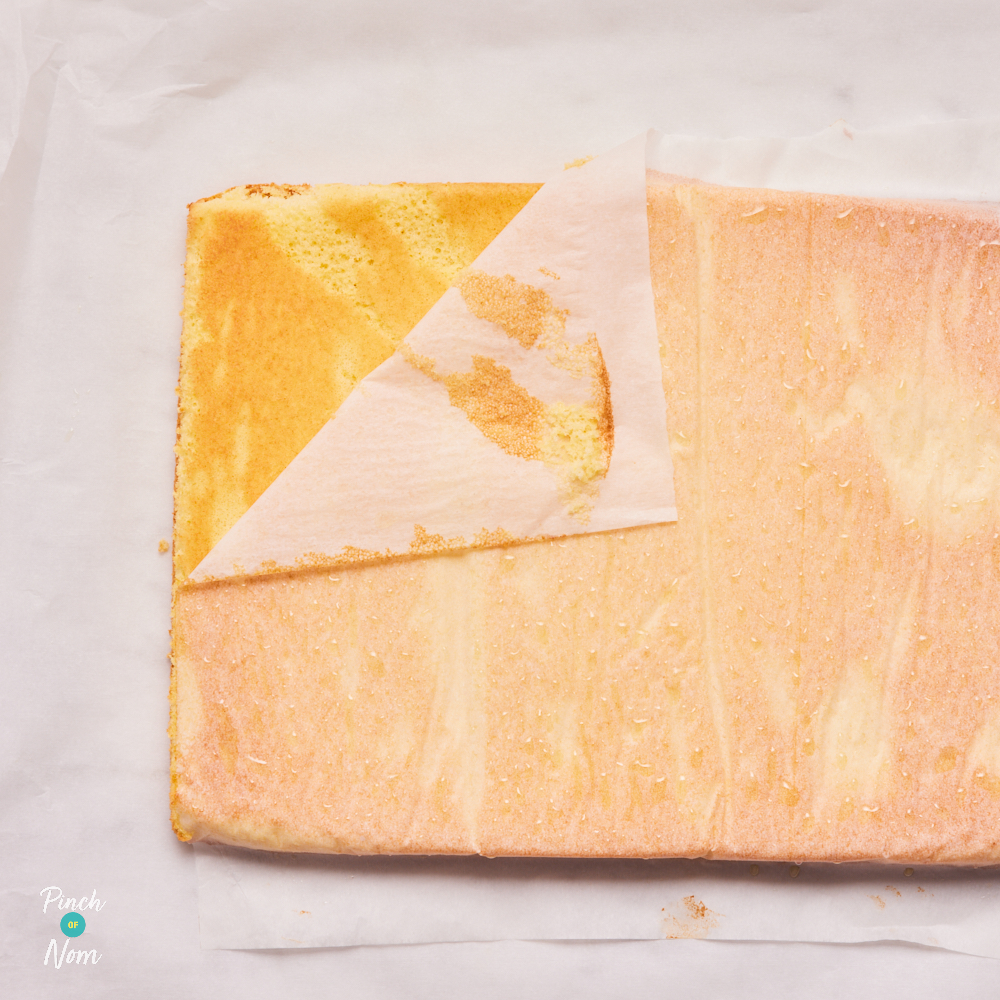
While the sponge is baking, cut another sheet of non-stick baking paper and a sheet of cling film from the roll, each approximately 50cm in length. Lay each sheet out separately on the work surface. Turn the cooked sponge out of the tin onto the sheet of non-stick baking paper, sponge side down. Carefully peel off the lining paper and discard.
Step 10
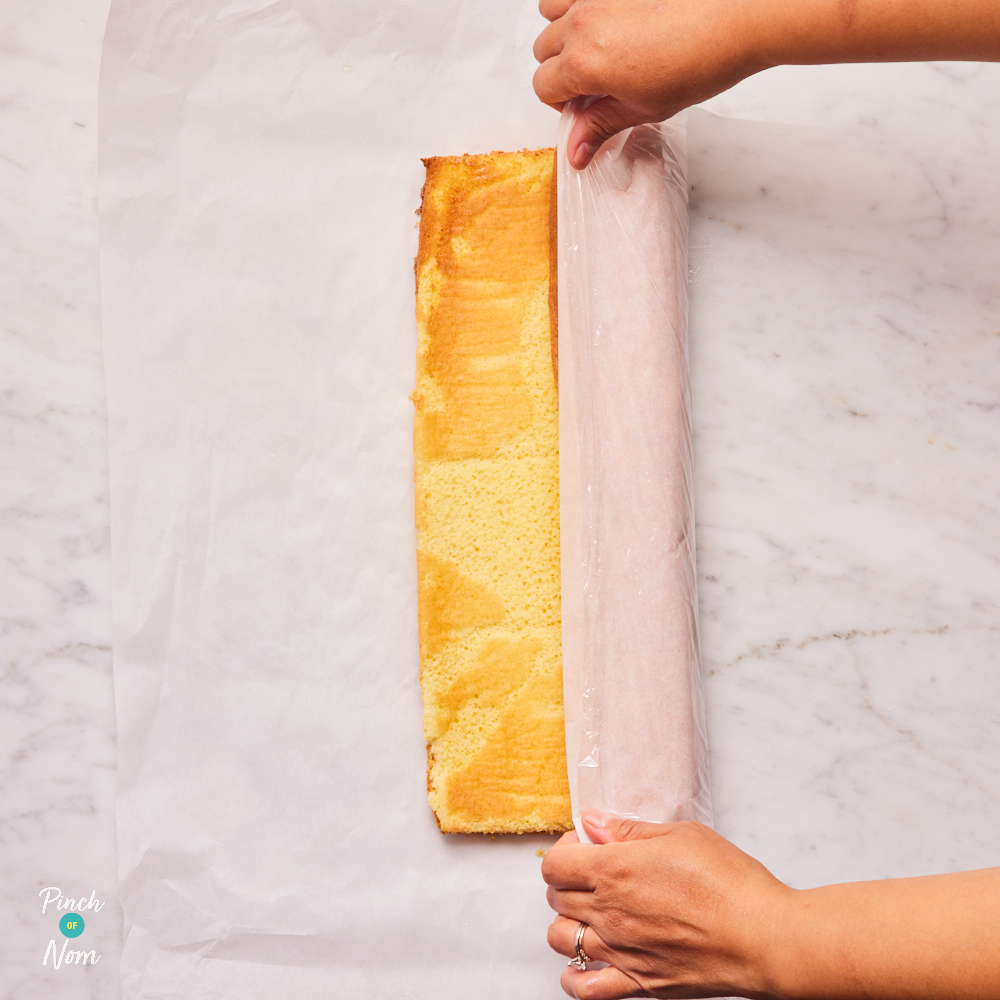
While the sponge is still warm, roll it up to form a Swiss roll, starting with the long side nearest to you and using the non-stick baking paper to help you. Place seam side down and leave to cool completely on the paper sheet.
Step 11
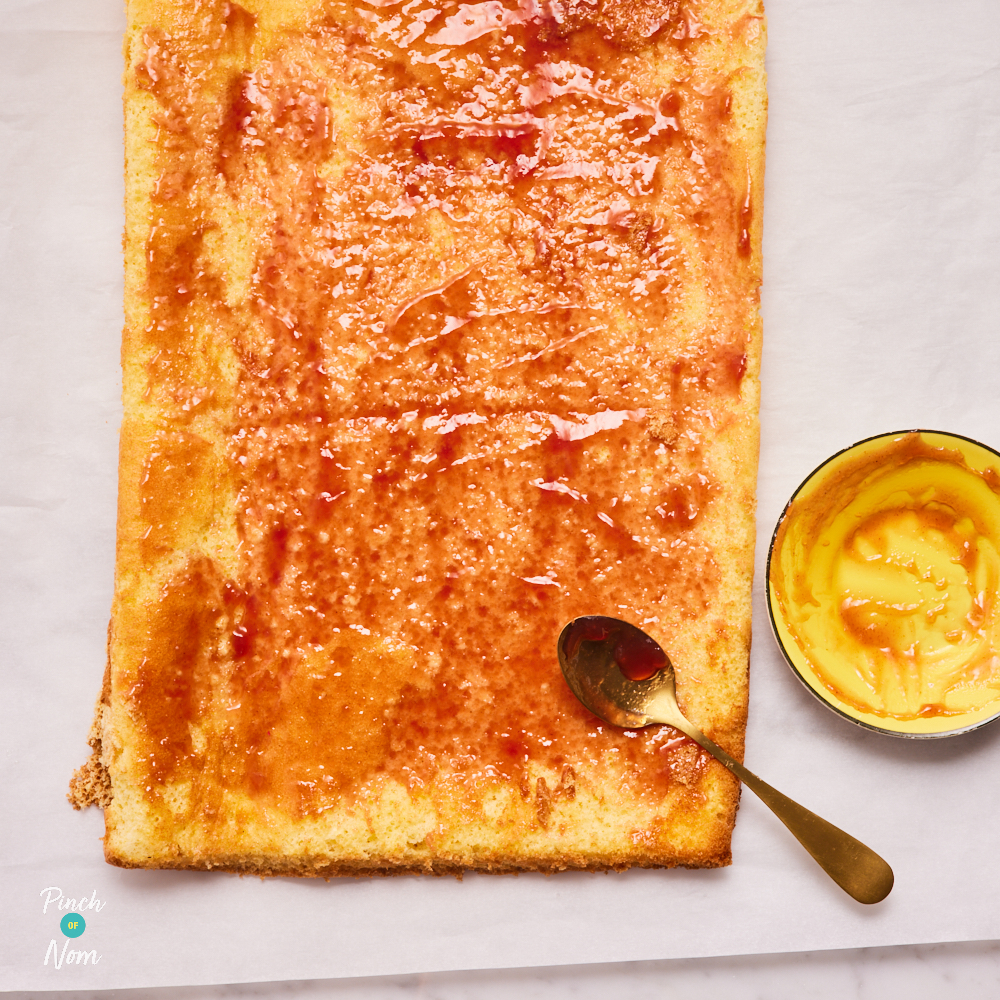
While the sponge is cooling, place 4 tbsp jam in a small bowl and stir to slacken so that it will spread easily. Gently unroll the cooled sponge out on the paper sheet and spread the jam evenly over the surface.
Step 12
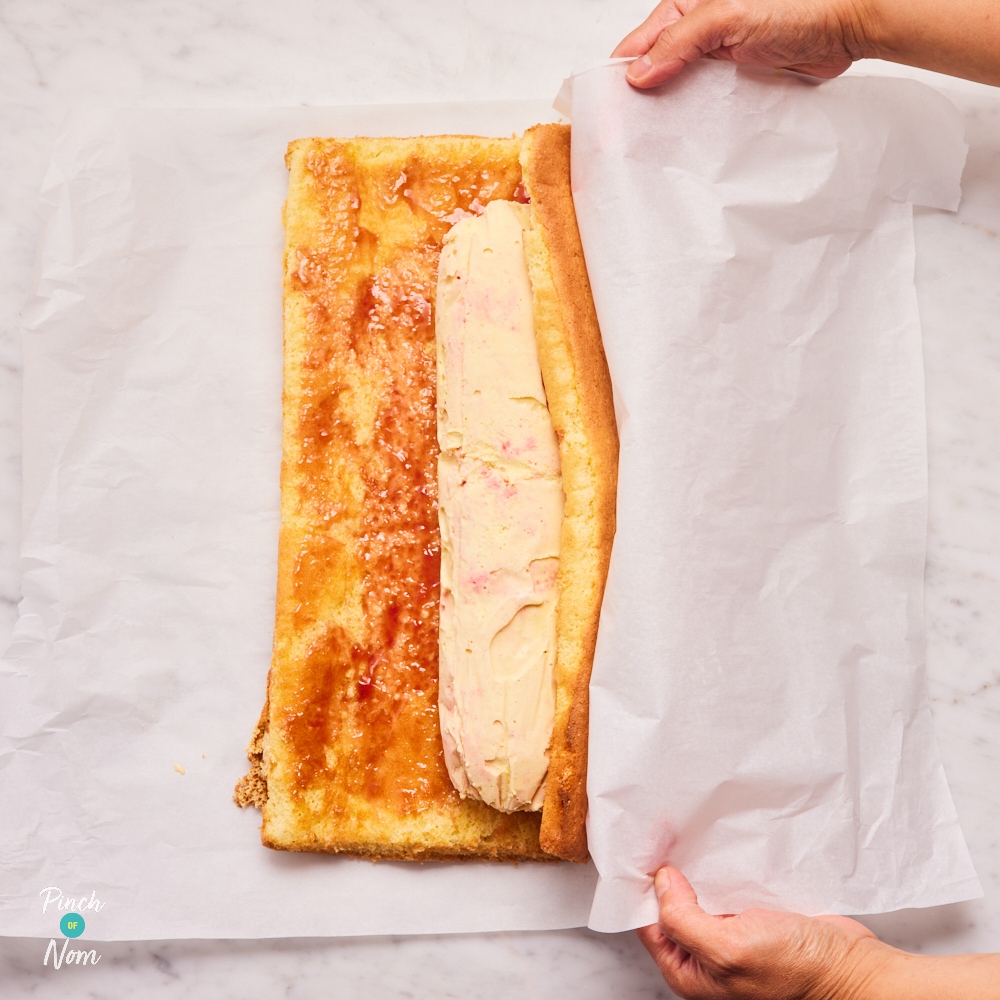
Remove the solid ice cream roll from the freezer and, working as quickly as you can, unwrap, discarding the paper and cling film. Place the solid ice cream roll lengthways down the centre of the sponge, on top of the jam. Quickly roll and ease the sponge around the ice cream roll; the edges of the sponge should just meet underneath. Place the Arctic Roll lengthways down the centre of the fresh non-stick baking paper sheet, seam side down.

Step 13
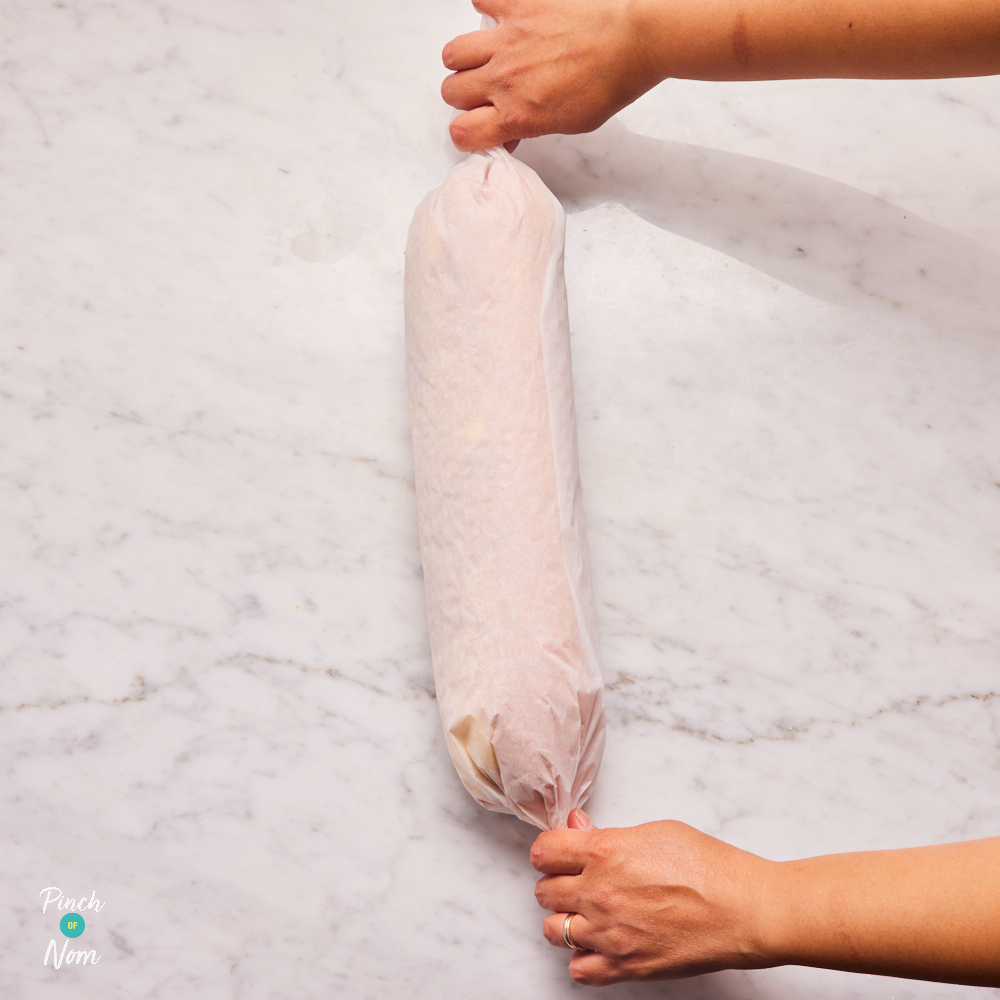
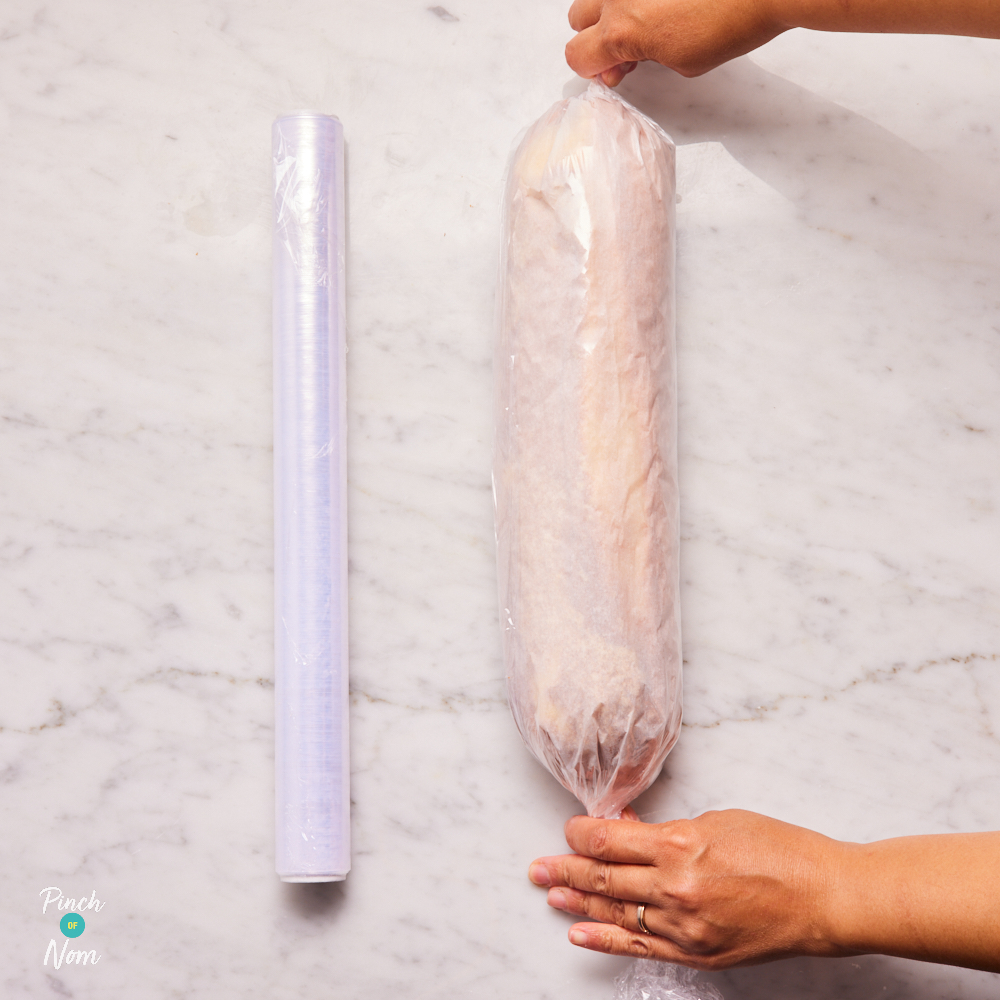
Quickly roll the Arctic Roll up tightly in the paper sheet, twisting the ends to seal. Place the wrapped roll lengthways down the centre of the fresh cling film sheet and wrap tightly, twisting the ends to seal. Quickly give it a little roll to help make a good cylinder shape and immediately place in the freezer. Freeze for 1½-2 hours until solid throughout.
Step 14
When ready to serve, unwrap and use a large, serrated knife to cut into 12 even slices. Serve at once.

What could I serve with this Raspberry Ripple Arctic Roll?
We love to serve this recipe as a light after-dinner treat. It’s delicious at the end of any meal, so why not enjoy the following recipes for dinner and then serve a slice for dessert?


How do you know when Raspberry Ripple Arctic Roll is ready?
You should bake the sponge for this Raspberry Ripple Arctic Roll until it is golden brown and springs back when you press in the centre. This should take 10-15 minutes.
Standard advice here in the UK is to cook food until it has reached 70°C and stayed at that temperature for 2 minutes. This is to keep your family safe.
Once the arctic roll is assembled, leave it in the freezer for at least 1½-2 hours, so it is completely frozen before serving.
How long can you keep Raspberry Ripple Arctic Roll in the freezer?
This recipe can be stored in the freezer for 2-3 months. You can either freeze the arctic roll whole, or cut it into individual slices, separated by squares of non-stick baking paper to make them easy to remove one at a time. Always use a container that is suitable for freezing, and don’t forget to add a label with what it is, and on what date you put it in the freezer!
If your arctic roll has started to melt, please note it should not be returned to the freezer. For more information about freezing foods safely, please take a look at the NHS website.
ORDER Our NEW cookbook Slow Cooker NOW
Raspberry Ripple Arctic Roll
If you like your desserts retro, fruity and frozen, this is the recipe for you! Our Raspberry Ripple Arctic Roll is a slimming-friendly version of the classic British frozen pud, where we’ve levelled up the flavour by making our own juicy raspberry puree to swirl through reduced-fat vanilla ice cream. Rolled up inside a light, airy, fatless sponge, it’s just 141 calories per slice!
-
Prep Time
1 HR
-
Cook Time
15 MINS
- KCals 141
- Carbs 26G
Instructions
- Cut a sheet of non-stick baking paper and a sheet of cling film from the roll, each approximately 50cm in length. Lay each sheet out separately on the work surface.
- Place the raspberries and 2 tbsp of jam in a food processor, or use a stick blender to blitz into a smooth puree. Push the puree through a nylon sieve into a small bowl to remove the pips. Discard the pips.
- Place the ice cream in a large bowl and break up a little with a wooden spoon. Leave to soften slightly for 5 minutes, taking care not to let it melt too much; it should be just softened enough to be able to stir in the raspberry puree. Add the raspberry puree and stir through the slightly softened ice cream with a large spoon, to create a rippled effect. Take care not to overmix otherwise the vanilla ice cream will become completely pink.
- Working as quickly as possible, spoon the rippled ice cream lengthways down the centre of the non-stick baking paper sheet. Use two dessert spoons to roughly shape the ice cream into a 32cm long, 4cm diameter cylinder shape. Roll the ice cream cylinder up tightly in the non-stick baking paper sheet, and twist the ends to seal tightly. Place the wrapped roll lengthways down the centre of the cling film sheet and roll up tightly, twisting the ends to seal. Immediately place in the freezer and freeze for 1½-2 hours until completely solid.
- Meanwhile, make the sponge cake. Preheat the oven to 160°C. Grease a 32.5cm x 22.5cm Swiss roll tin with low-calorie cooking spray and line the base and sides with a sheet of non-stick baking paper.
- Place the eggs, granulated sweetener, caster sugar and vanilla extract in a large bowl. Use an electric whisk to whisk on high speed for 10 minutes until very thick, pale and creamy. The mixture should hold a 'ribbon' trail when the whisk is lifted out.
- Sift the flour into the mixture a little at a time and use a large spoon to gently fold in until just combined. Take care not to overmix, otherwise you will knock out the air you have incorporated.
- Scrape into the prepared tin and gently spread out evenly. Place in the preheated oven for 10-15 minutes until golden. Gently press the centre of the sponge, it should spring back when it's ready and leave no indent.
- While the sponge is baking, cut another sheet of non-stick baking paper and a sheet of cling film from the roll, each approximately 50cm in length. Lay each sheet out separately on the work surface. Turn the cooked sponge out of the tin onto the sheet of non-stick baking paper, sponge side down. Carefully peel off the lining paper and discard.
- While the sponge is still warm, roll it up to form a Swiss roll, starting with the long side nearest to you and using the non-stick baking paper to help you. Place seam side down and leave to cool completely on the paper sheet.
- While the sponge is cooling, place 4 tbsp jam in a small bowl and stir to slacken so that it will spread easily. Gently unroll the cooled sponge out on the paper sheet and spread the jam evenly over the surface.
- Remove the solid ice cream roll from the freezer and, working as quickly as you can, unwrap, discarding the paper and cling film. Place the solid ice cream roll lengthways down the centre of the sponge, on top of the jam. Quickly roll and ease the sponge around the ice cream roll; the edges of the sponge should just meet underneath. Place the Arctic Roll lengthways down the centre of the fresh non-stick baking paper sheet, seam side down.
- Quickly roll the Arctic Roll up tightly in the paper sheet, twisting the ends to seal. Place the wrapped roll lengthways down the centre of the fresh cling film sheet and wrap tightly, twisting the ends to seal. Quickly give it a little roll to help make a good cylinder shape and immediately place in the freezer. Freeze for 1½-2 hours until solid throughout.
- When ready to serve, unwrap and use a large, serrated knife to cut into 12 even slices. Serve at once.
Looking for Slimming World Syns or Weight Watchers (WW) Points?
With ever-changing plans and point calculations, we have made the decision to remove WW Points from the website - referring to your individual plan or advice from your consultant is always going to give the most accurate results.
—
We agreed with Slimming World to remove their trademarked terms from our website
Recipe notes
If you’ve made Raspberry Ripple Arctic Roll and love it, let us know by tagging us in your photos!
2 comments
See what others have to say
BinduThursday 21st March 2024
Hi. Instead of sweetener can I use only castor sugar? If so the same quantity? Or less sugar?
HollyThursday 21st March 2024
Hey Bindu, you can swap the sweetener for sugar, as we use sweetener that is granulated and the same texture as sugar you can use the same weight in the recipe and alter the calories accordingly. Hope that helps!
Join the conversation
Comment or ask our advice