

Chicken Kievs
These slimming and Weight Watchers friendly Chicken Kievs are just as good as the old favourite and are really versatile!

Also in these categories:


NutritionPer Serving
- Calories268
- Carbs9.9g
- Protein37g
- Fat8.9g
- Saturates2.6g
- Sugars1.2g
Your dishes
You’re amazing, look at the Chicken Kievs dishes you’ve made…


For the full list of ingredients and comprehensive instructions, please see the recipe card at the end of this post. Before you scroll, there’s important stuff to know in the blurb!
These Chicken Kievs are a fantastic, slimming friendly take on the classic dish and are so delicious that you’d never guess that they’re low on calories and Points.
You could easily adapt this recipe to suit your tastes – you could add leave out the garlic and add some chilli, or replace the parsley with chives, why not have an experiment!
What diets are these Chicken Kievs suitable for?
These Chicken Kievs can be made suitable for gluten free diets as long as you swap out the following ingredients for gluten free alternatives;
- Wholemeal bread
They can also be made dairy free by swapping the following ingredients out for dairy free versions;
- Flora Light
Please make sure to double or triple check all of your ingredients if you’re cooking for people with allergies.
Do you need any special ingredients to make these Chicken Kievs?
This post contains affiliate links. Find out what this means.
This recipe uses an electric mini chopper to whizz up the filling and breadcrumbs. You can find all the ingredients in the supermarket!
Hints & Tips
Below we added some of our communities most common hints and tips. We hope you find them useful.
Send us a Hint or Tip
We love hearing from you, submit any tips or tricks you have for this dish and we’ll review them and add some of them here. Just click here.
SEND US a HINT & TIP, Or QUOTE for this recipe
THANKS
we have your picture
The process
- Check
Now we have your Hint & tip
we’ll check them over. - Review We’ll review your Hint & Tip, and see if its suitable to use on the website.
Your details
- Name: %name%
- Recipe: %recipeName%
YOUR HINTS & TIPS
Your “QUOTE”
SWAG!
Due to the large number of submissions we recieve we’re afraid we’ll only inform you if we use it on the Recipe page - then we’ll send you some swag…
(Please remember others may of had the same idea as you!)
‘Exceptional!’
This post contains affiliate links: what this means
You can pick this Mini Electric Chopper on Amazon!
How many calories are in these Chicken Kievs?
There are 268 calories per portion in these Chicken Kievs, which means they fall into our Everyday Light category.
These Chicken Kievs are perfect if you’re following a calorie controlled diet, and fit well with any one of the major diet plans such as Weight Watchers.
As a guide, an average man needs around 2,500kcal (10,500kJ) a day to maintain a healthy body weight. For an average woman, that figure is around 2,000kcal (8,400kJ) a day. Obviously, if your goal is to lose weight then you might want to adjust these slightly! You can read more about these recommendations on the NHS website.
Step 1
Preheat the oven to 170ºC and line a baking tray with greaseproof paper.
Step 2
Into a mini electric chopper place the garlic, parsley, vegetable stock pots, water and reduced fat spread. Whizz until the garlic and parsley are chopped, being careful not to form a paste. Place into a dish and chill for 15 minutes.

Step 3
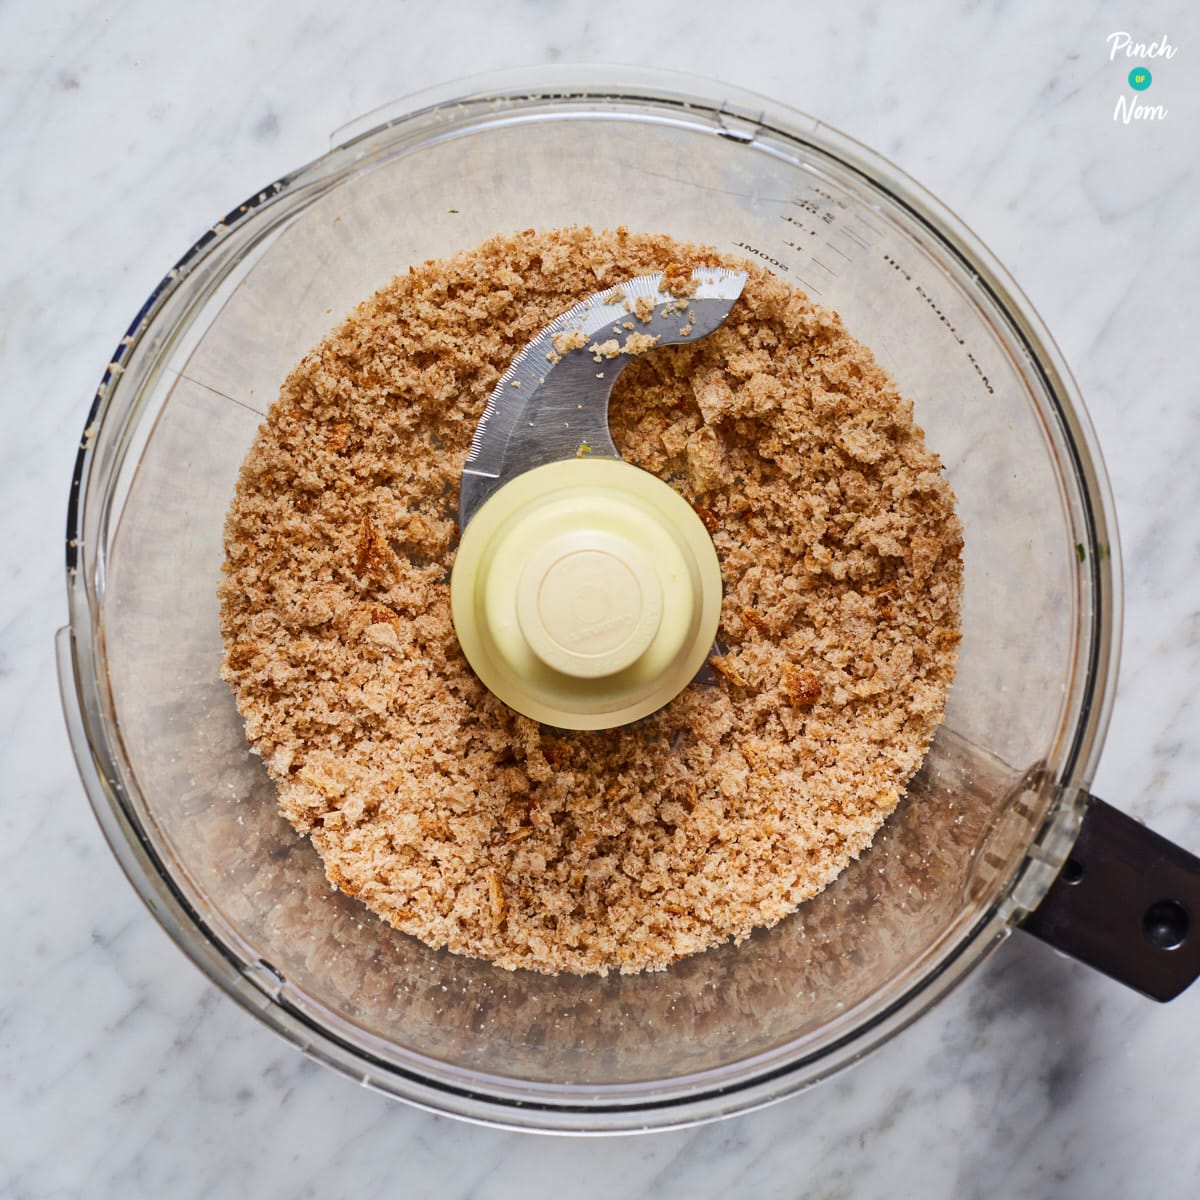
Using the mini electric chopper, whizz the bread into fine breadcrumbs.
Step 4
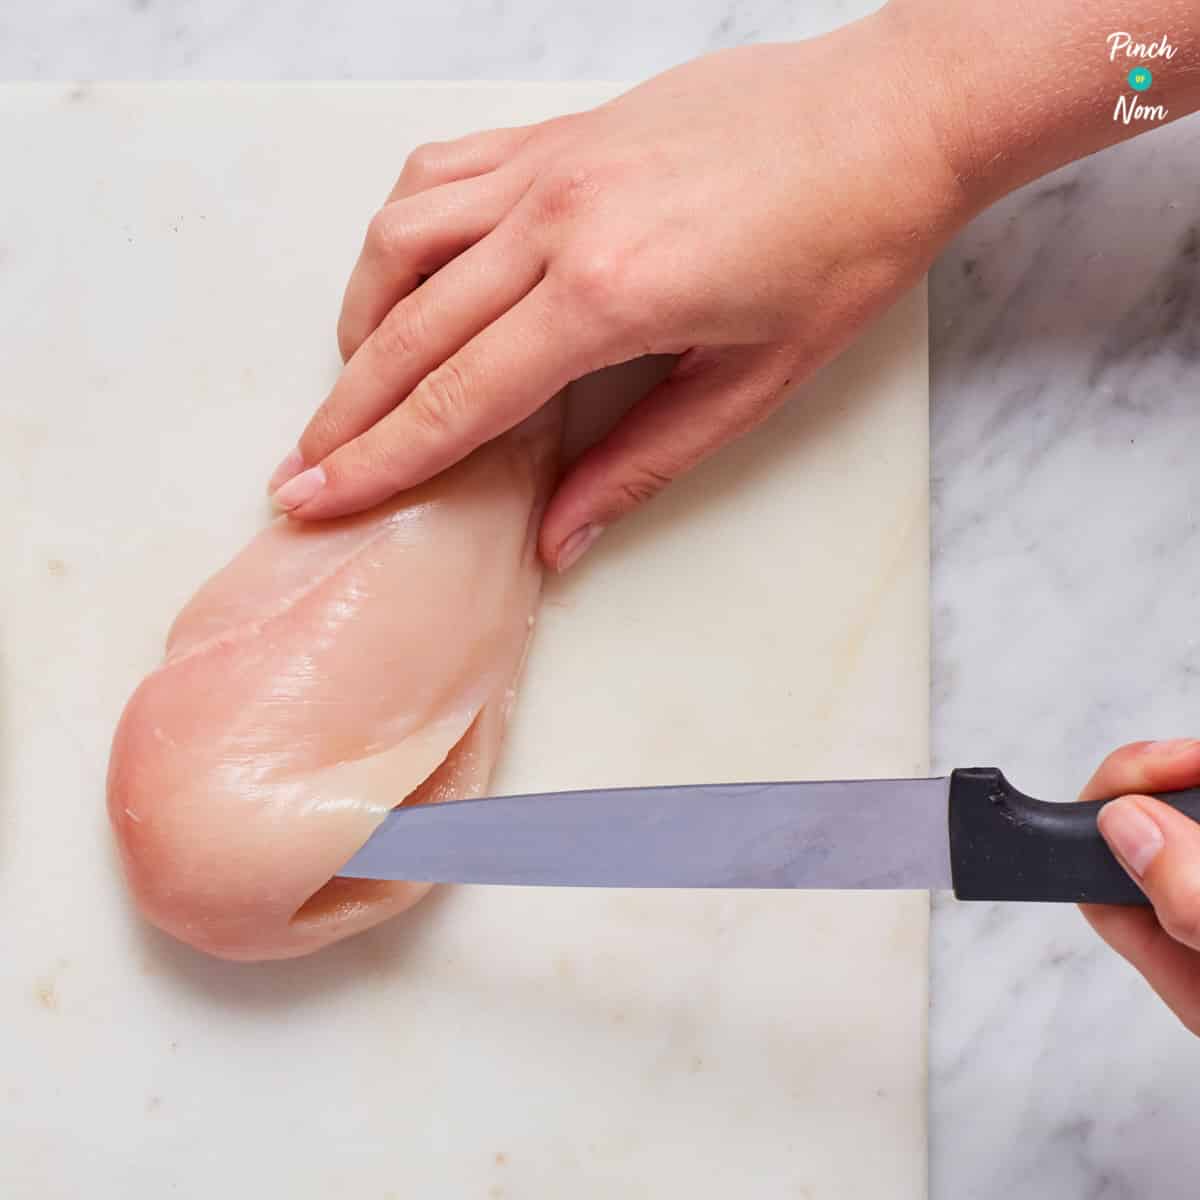
Using a very sharp knife, cut a pocket into the chicken – place the knife into one end, being careful not to cut through to the outside.
Step 5
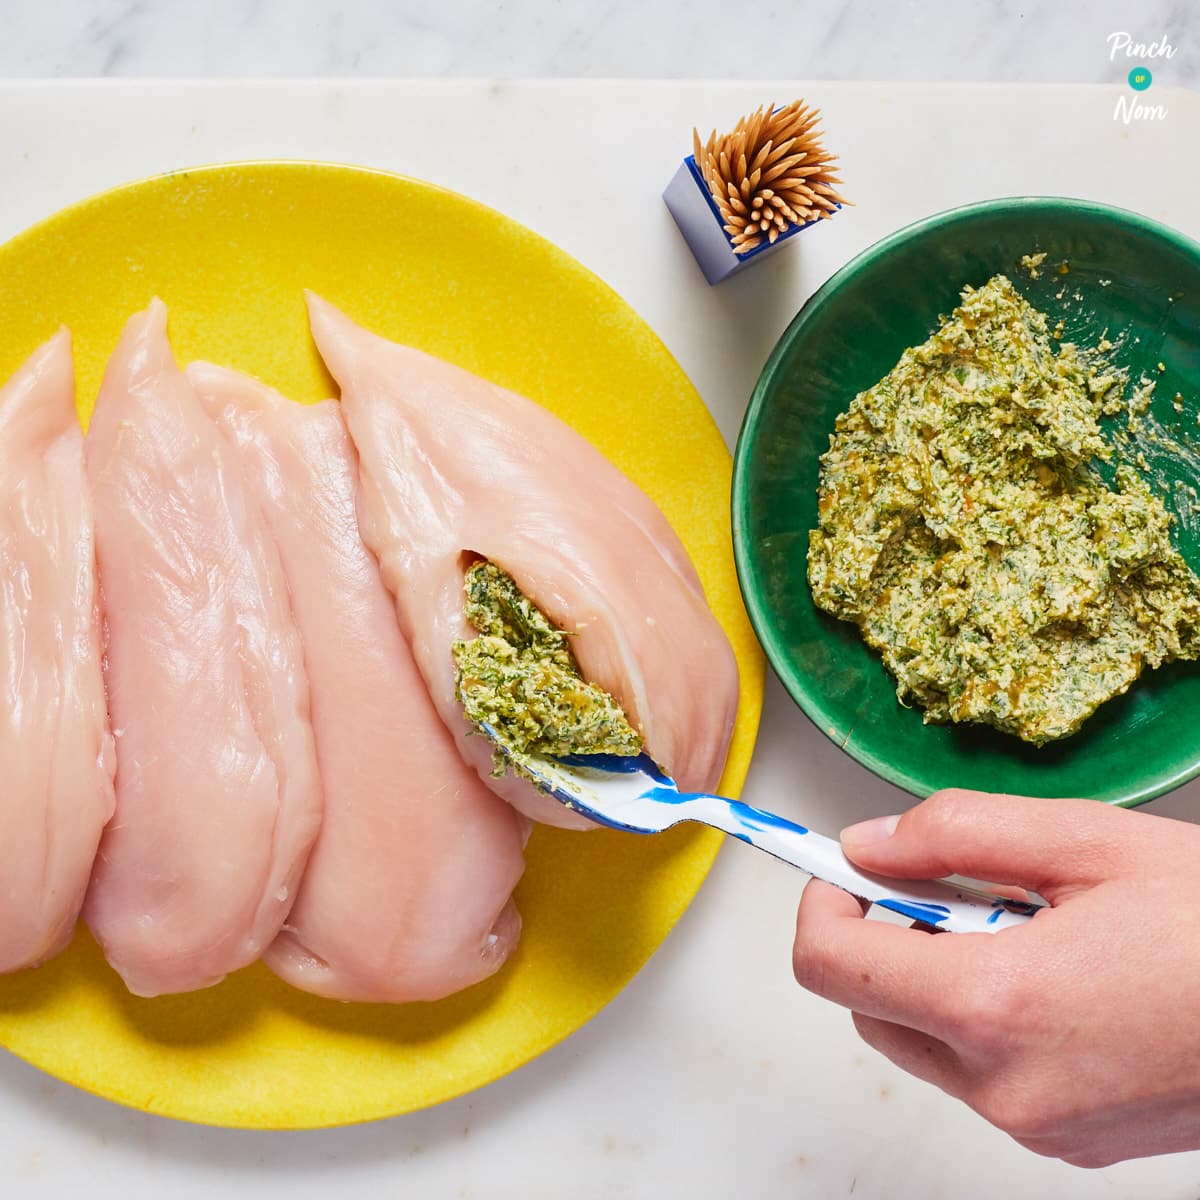
Once the garlic mixture has chilled, spoon evenly into the pocket in the chicken breasts, filling as much as possible. Pin closed with a cocktail stick.
Step 6
Beat the eggs and place into a shallow dish. Place the breadcrumbs into a separate shallow dish. Dip each chicken breast into the egg, and then lightly cover with breadcrumbs in the second dish.
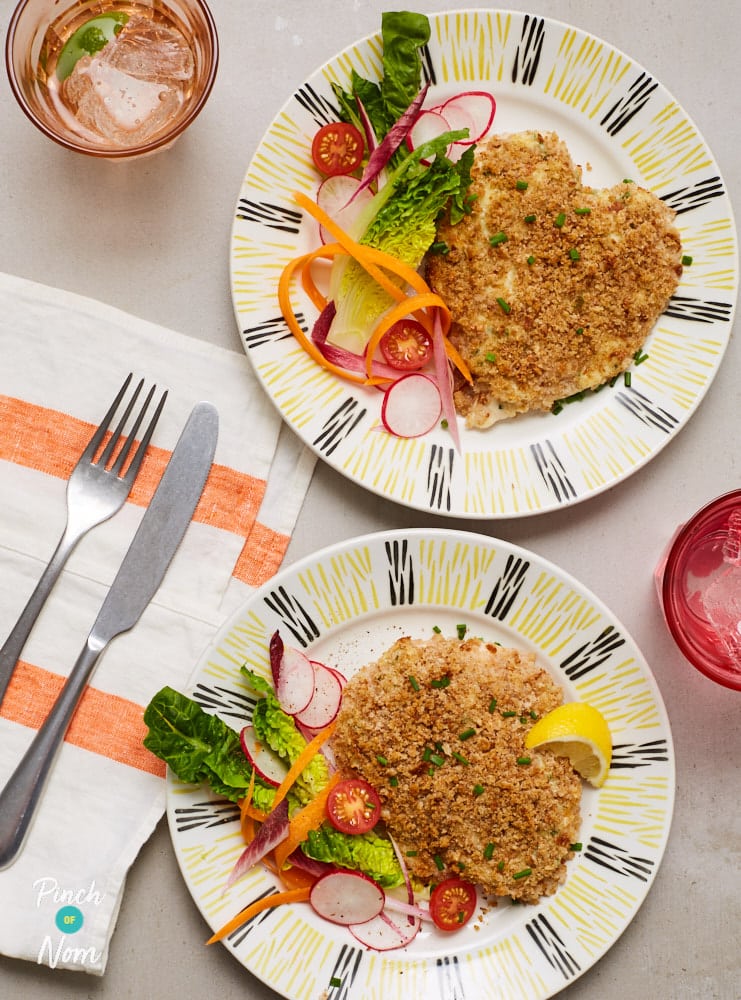
Step 7
Place each crumbed chicken breast onto the baking tray, spray with low calorie cooking spray and cook for 30 minutes until golden and crisp. Serve with a wedge of lemon and your choice of accompaniment!

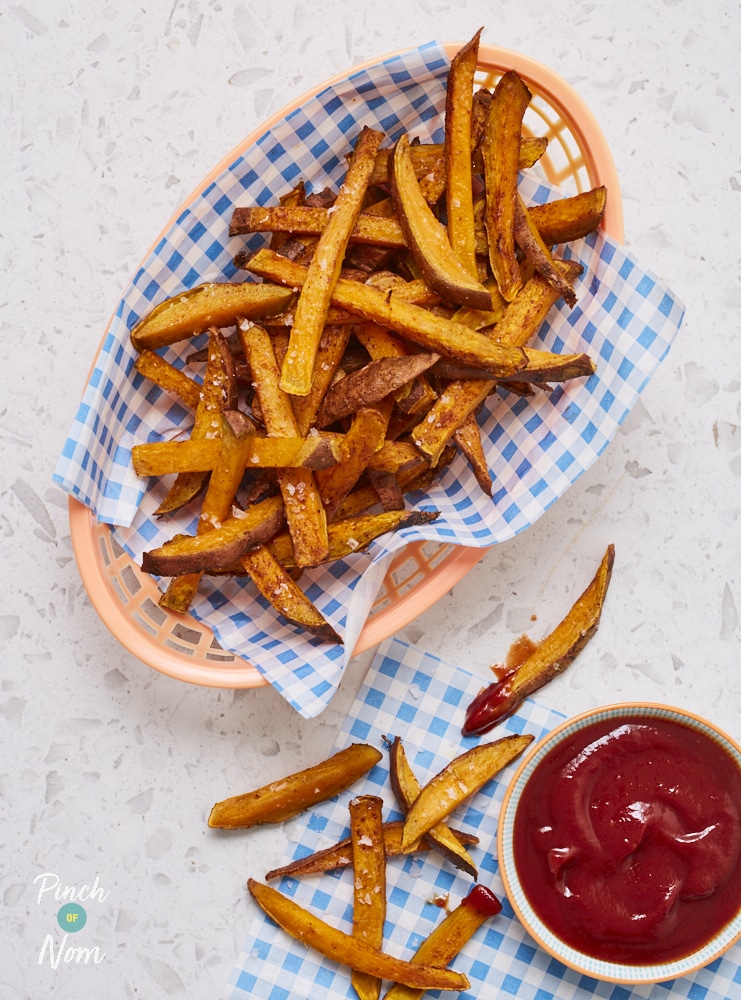
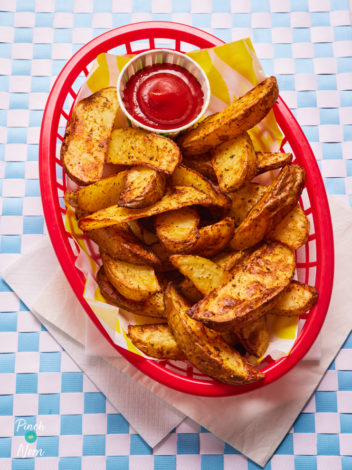
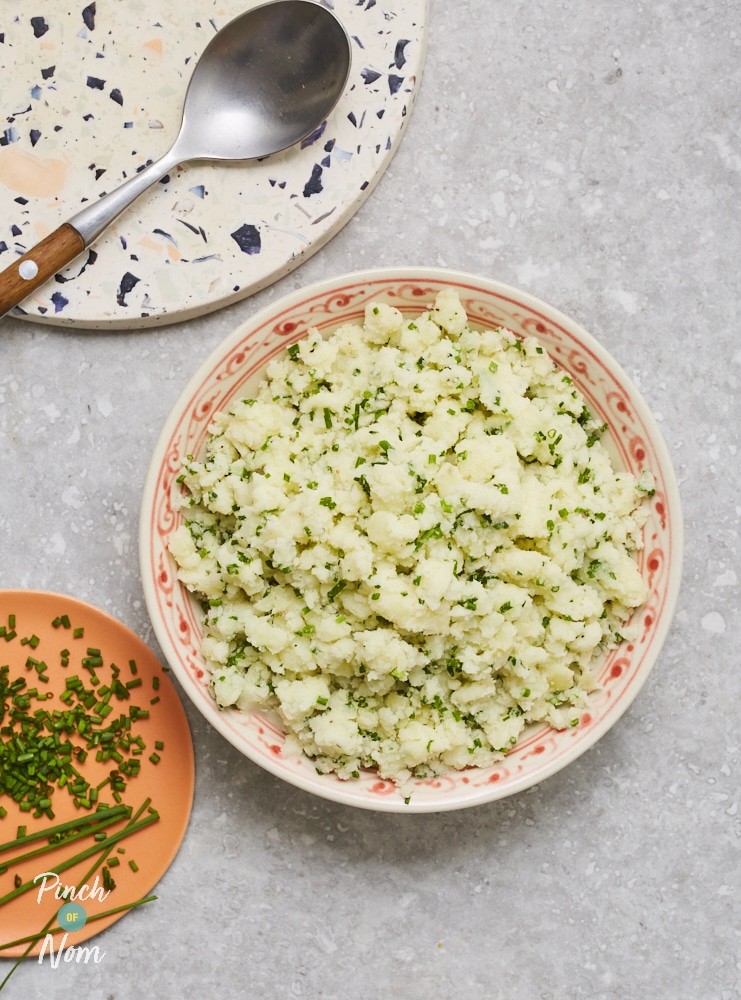
What could I serve with these Chicken Kievs?
These Chicken Kievs work really well when served alongside any of the following accompaniments:

How do you know when these Chicken Kievs are cooked?
You should cook these Chicken Kievs for around 30 minutes or until golden and crisp and the chicken is cooked through.
Standard advice here in the UK is to cook food until it has reached 70°C and stayed at that temperature for 2 minutes. This is to keep your family safe.
How long can you keep these Chicken Kievs in the fridge?
Once you’ve put this dish out, ideally you should eat it within 4 hours.
If you allow any leftovers to cool, make sure to refrigerate in a container with a lid and chill. You can keep leftovers of these Chicken Kievs in the fridge for approximately 3 days or so.
Can I freeze these Chicken Kievs?
Yes you can! This recipe can be frozen, but please remember to do the following;
- Freeze it as soon as it is cold enough.
- Use a container or bag that is suitable for freezing.
Don’t forget to add a label with what it is, and on what date you put it in the freezer!
How do I reheat these Chicken Kievs?
From chilled: Pop into a moderately hot oven for around 20 minutes or until piping hot.
From frozen: Allow to defrost and then pop into a moderately hot oven and heat for around 25 minutes or until piping hot.
ORDER Our NEW cookbook Slow Cooker NOW
Chicken Kievs
These slimming and Weight Watchers friendly Chicken Kievs are just as good as the old favourite and are really versatile!
-
Prep Time
10 MINS
-
Cook Time
30 MINS
- KCals 268
- Carbs 9.9G
Instructions
- Pre-heat the oven to 170ºC and line a baking tray with greaseproof paper.
- Into a mini electric chopper place the garlic, parsley, vegetable stock pots, water and reduced fat spread. Whizz until the garlic and parsley are chopped, being careful not to form a paste. Place into a dish and chill for 15 minutes.
- Using the mini electric chopper, whizz the bread into fine breadcrumbs.
- Using a very sharp knife, cut a pocket into the chicken - place the knife into one end, being careful not to cut through to the outside.
- Once the garlic mixture has chilled, spoon evenly into the pocket in the chicken breasts, filling as much as possible. Pin closed with a cocktail stick.
- Beat the eggs and place into a shallow dish. Place the breadcrumbs into a separate shallow dish. Dip each chicken breast into the egg, and then lightly cover with breadcrumbs in the second dish.
- Place each crumbed chicken breast onto the baking tray, spray with low calorie cooking spray and cook for 30 minutes until golden and crisp. Serve with a wedge of lemon and your choice of accompaniment!
Looking for Slimming World Syns or Weight Watchers (WW) Points?
With ever-changing plans and point calculations, we have made the decision to remove WW Points from the website - referring to your individual plan or advice from your consultant is always going to give the most accurate results.
—
We agreed with Slimming World to remove their trademarked terms from our website
Love this Chicken Kievs recipe? Tag us!


41 comments
See what others have to say
CurlyTuesday 18th October 2022
How long would you airfry these for please??? Recipes with timings for those of us experimenting with air fryers/multicookers would be very much appreciated 🙂
SharonTuesday 18th October 2022
Hi, we haven’t tested these Chicken Kievs in an air fryer but would estimate about 20 minutes. Just make sure the chicken is thoroughly cooked, shows no sign of pinkness and the juices run clear. We have a handy article that will help you convert recipes for cooking in an air fryer: How to Convert Recipes to an Air Fryer Do hope this helps!
libbyTuesday 4th May 2021
Hi there when do you take the cocktail stick out, Do you dip the chicken in the egg and breadcrumbs with it in?
HollyMonday 10th May 2021
Hey Libby, leave the cocktail stick in for dipping into the egg and breadcrumbs and remove it once the Chicken Kiev is cooked. Hope that helps!
RebeccaMonday 22nd March 2021
Made these tonight. They taste great, however it’s very messy to prep, was for me anyway! Next time I think I will make the paste for the middle the night before and freeze them into discs so that they are frozen when you put it in to the chicken
HollyWednesday 31st March 2021
Hey Rebecca, thanks so much for your message we are so glad to hear you enjoyed this recipe and thanks for your tip for the kiev filling!
Dawn TaylorThursday 11th February 2021
Hi, super recipe, could you please tell me which of your books the CHICKEN KIEV recipe is in…..I’m hooked
Dawn
HollyThursday 11th February 2021
Hey Dawn, the Chicken Kievs appear in our latest book Quick and Easy have a look HERE for more information
LouiseSunday 17th January 2021
These look amazing!
What can you use instead of egg to get the breadcrumbs to stick to the chicken?
Thanks 😊
HollyMonday 18th January 2021
Hi Louise, you could dip the chicken in yogurt instead of egg hope that helps!
LaraSunday 20th December 2020
I have just made these. As advised above only used 1 stock pot. I also used gluten free bread for the crumb. I havent had a chicken Kiev since being a child. I found out i was wheat intolerant when i was younger. I have to say these were even better than i remembered. My husband thought they were the best ones he has ever eaten. Better than the processed chicken. Outstanding. Thank you so very much! Will be a regular meal in our home.
HollyMonday 21st December 2020
Hi Lara, thank you so much for your message! We are so glad you enjoyed the Chicken Kievs.
Karina EllawaySunday 1st November 2020
I made this last night for our best friends and they said it was the nicest homemade chicken Kiev I have made, I obviously agreed. I want to freeze them so they are ready to go, has anyone done this?
HollyMonday 2nd November 2020
Hi Karina, so glad you and your friends enjoyed the Chicken Kievs! Yes you can freeze these but please remember to do the following freeze it as soon as it is cold enough and use a container or bag that is suitable for freezing. When it comes to reheating defrost thoroughly and pop into a moderately hot oven for around 20 minutes or until piping hot. Hope that helps!
Jennifer IrvingThursday 10th September 2020
The garlic butter didn’t set. Recipe just states water, is this in accordance with the the stockpot instructions or less? also should it be boiling water to desolve stockpot? I don’t feel this part of the recipie is clear enough. Sorry
LisaThursday 10th September 2020
Hi Jennifer
If you scroll down to the end of the web page, you will find a recipe card that lists all the ingredients and quantities. There you’ll find the quantity of water needed. It is only 2 tsp. It goes into the mini chopper along with the stockpots (just put them straight in, no need to dissolve them) and the rest of the garlic butter ingredients which is then is blended up. The instructions for this are in step 2. I hope this clarifies things. It’s a really popular recipe and I hope you have another go.
Karina HendersonSaturday 29th August 2020
Made this tonight, absolutely delicious! I’ll play around with flavours, maybe just one stockpot next time
HollyTuesday 1st September 2020
Hi Karina, so glad you enjoyed the Chicken Kievs!
Toni-Ann GarrettWednesday 26th August 2020
Really nice however slightly too salty with the recommended amount stock pot for me. I would use less next time. But otherwise, really tasty
HollyFriday 28th August 2020
Hi Toni-Ann, glad you enjoyed the Chicken Kievs and like you said just alter it to your own taste for next time!
samantha nylandTuesday 26th May 2020
Is it safe to prepare these the night before then cook?
Sharon FitzpatrickWednesday 27th May 2020
Hi Samantha, yes, you can prepare these the night before as long as you are using fresh chicken. If you are using chicken that has been frozen and defrosted , you should cook it on the same day that it defrosted.
StephMonday 20th April 2020
Best chicken Kiev recipe I have found and I have tried a LOT! I only had one veg stock pot so used that plus a chicken one and it tasted great. Deeeelicious. Another belter ladies, thank you!
Sharon FitzpatrickWednesday 6th May 2020
Hi Steph, thankyou so much for your lovely comment. It’s great to hear you you thought this was the best Chicken Kiev recipe you’ve ever made!
Cristina Box-PulidoThursday 16th January 2020
Hi, I have entered all the ingredients on a food planner I use and I have copied the recipe on it but the calorie per serving comes a lot higher than yours! What is the weight of the chicken breasts used here?
Steve CowderoyFriday 22nd May 2020
Hi Cristina, thanks for getting in touch with us. The weight of chicken breast we use are about 140g each. Hope this helps.
LaurenSaturday 6th July 2019
Hi there I’m making these tonight,
And we don’t have vegetarian stock pots only cubes will this be ok ??
Cate MeadowsWednesday 6th May 2020
Yes you could! You can dissolve them in a tablespoon of boiling water to get the right consistency 🙂
Sarah ReadSaturday 18th May 2019
Hi. I’ve made these before and they were lovely. Would like to freeze them but was wondering if I can freeze them raw as I’m worried they’ll dry out if I cook, freeze and then reheat. Not sure if the egg/breadcrumb coating will survive if I freeze them raw though. Thanks
Emma TMonday 3rd June 2019
Hi Sarah,
You could try freezing them raw before adding the breadcrumbs – then defrost and add the breadcrumbs before cooking ????
Nicola FrenchSunday 28th April 2019
These are superb and actually taste like chicken Kiev’s. A big thumbs up!
Will cut a pocket in the end next time, made the mistake of cutting longside and needing at least 3 cocktail sticks to hokd and the filling still oozed out a bit!
PamelaThursday 24th January 2019
Just realised I’m out of vegetable stock pots, would chicken be over powering?
RachelFriday 4th January 2019
Made these today. Absolutely delicious ????
TraceySunday 2nd September 2018
Hi, looking to make this. Can I make the butter a few days in advance (how long will it last in the fridge) and can you freeze the mixture?
SarahTuesday 28th August 2018
How much dried parsley should I use instead of fresh ?
JenSaturday 18th August 2018
Made these tonight really enjoyed them. Didn’t look as good but tasted really nice
suzanneThursday 26th July 2018
looks lush, when freezing… would I freeze from after they are cooked and cooled?
KatieMonday 23rd July 2018
Hi I’ve just realised I’ve not got stock pots only stock cubes in and I’m making this tonight! Could I use cubes instead or do you need the texture from the stock pot?
SaraThursday 19th July 2018
Hey, I am going to attempt to make this tonigt looks delicious! Just wanted to ask when cutting the chicken breast did you cut horizontally across (like butterfly) or vertically from the side to create the pocket? Many thanks x
KellyTuesday 17th July 2018
Hi, I’m going to try this, it looks lovely! I wondered if I could use philly light as my HEXB instead of flora? Thought it may give it a creamy texture? Or would this not work at all? Looking forward to trying diathermy way! Thanks PON!
Zoe ProsserWednesday 1st August 2018
Hi Kelly, did you try this with the philly light instead of flora? I want to try this myself but it would be a waste if you have tried and it didn’t work! 🙂
Join the conversation
Comment or ask our advice